Nail Polish Chemistry: How Nail Polish Works and What It’s Made Of

Nail polish is a type of lacquer used to decorate fingernails and toenails. Because it has to be strong, flexible, and resist chipping and peeling, it contains a number of chemicals. Here is a look at the chemical composition of nail polish and the function of each of the ingredients.


Chemical Composition of Nail Polish

A basic clear nail polish could be made from nitrocellulose dissolved in butyl acetate or ethyl acetate. The nitrocellulose forms a shiny film as the acetate solvent evaporates. However, most polishes contain an extensive list of ingredients.


  • Solvents

Solvents are liquids used to mix the other ingredients in a nail polish to yield a uniform product. Once you apply the polish, solvents evaporate away. The amount and type of solvent determines how thick a polish is and how long it takes to dry. Examples of solvents include ethyl acetate, butyl acetate, and alcohol. Toluene, xylene, and formalin or formaldehyde are toxic chemicals that used to be common in nail polish but are found rarely now or in low concentrations. Usually, the first ingredient(s) in a nail polish are solvents.


  • Film Formers

Film formers are chemicals that form the smooth surface on a coat of nail polish. The most common film former is nitrocellulose.


  • Resins

Resins make the film adhere to the nail bed. Resins are ingredients that add depth, gloss, and hardness to the film of a nail polish. An example of a polymer used as a resin in nail polish is tosylamide-formaldehyde resin.


  • Plasticizers

While resins and film formers give polish strength and gloss, they produce a brittle lacquer. Plasticizers are chemicals that help keep polish flexible and reduce the chance that it will crack or chip. They do this by linking to polymer chains and increasing the distance between them. Camphor is a common plasticizer.


  • Pigments

Pigments are chemicals that add color to nail polish. An astonishing variety of chemicals may be used as pigments in nail polish. Common pigments include iron oxides and other colorants, such as you would find in paint or varnish.


  • Pearls

Nail polish that has a shimmery or glittery effect may contain pearlescent minerals, such as titanium dioxide or ground mica. Some polishes may contain bits of plastic glitter or other additives that produce a special effect.


  • Additional Ingredients

Nail polishes may contain thickening agents, such as stearalkonium hectorite, to keep the other ingredients from separating and to make the polish easier to apply. Some polishes contain ultraviolet filters, such as benozophenone-1, which help prevent discoloration when the polish is exposed to sunlight or other forms of ultraviolet light.


As the professional epoxy resin manufacturer, Epolab Chemical Industries Inc. also provides nail polish for customers. Their epoxy nail polishes are colorful, high color saturation and excellent durability which quickly solidified in most of the LED lamps, and qualified full inspection by SGS. If you have interest or requirement of epoxy nail polish, no hesitation, contact with Epolab right away!


Article Source: ThoughtCo.

What Is a Spring Return Actuator?

A spring return actuator is a control device that supplies one-way powered motion with the impetus for its return stroke being supplied by a spring. For example, a spring return door actuator will only open the door under its own power with the door being closed again by a spring arrangement. The simple solenoid is a good example of a spring return actuator, with the solenoid plunger being returned to its neutral position by spring tension. The fact that the actuator only supplies a single-powered stroke simplifies the actuator control system with commensurate reductions in unit cost and maintenance requirements. The spring return actuator typically has a longer service life, further enhancing the cost savings on such systems.


Conventional bi-directional actuators supply powered actuation force for both their working and return strokes. This is typically achieved by reversing the direction of an electric motor or, in the case of hydraulic and pneumatic systems, pumping compressed oil or gas into the opposite side of the actuator cylinder. In contrast, a spring return actuator only utilizes a powered stroke on one-half of its working cycle. The impetus for the return stroke that resets the mechanism to its neutral position is supplied by a spring arrangement. One of the best examples of this concept is the linear solenoid that uses a spring to return its plunger once power is cut to the coil.


There are many types of spring return actuator mechanisms available for both linear and rotary output applications. In some cases, the return spring is an integral part of the actuator mechanism and, in others, a separate unit. The rate at which the return spring moves the secondary mechanism is often governed to produce a specific reset speed. In many cases, this governing function is achieved courtesy of a separate hydraulic damper typically fitted with an adjustable damping valve mechanism, allowing for fine-speed settings to be made.


The single powered stroke of a spring return actuator holds several benefits, including low installation costs, long service life, and reduced maintenance. The benefits can be attributed to the relative simplicity of the systems and the reduced number of control elements and duty cycles required for their operation. This means slightly lower initial costs and reduced running expenses. It also ensures superior longevity of the actuator and its power supply as only half of the normal duty cycles performed for each actuation.


If you have interest in spring return actuators, I recommend you to visit Sun Yeh Electrical Ind. Co., Ltd. – they are the professional electric actuators supplier in Taiwan. Today, contact with Sun Yeh for more details of spring return electric actuators.


Article Source: https://www.wisegeek.com/what-is-a-spring-return-actuator.htm

Advantages and Disadvantages of CNC Woodworking Machines

CNC machinery revolutionized the commercial woodworking process. At a time when machines were operated manually, CNC technology made them operable by computer – a sweeping improvement that made high speed, high quality production a reality. Today, CNC machines’ cutting accuracy and production speed are at an all-time high. But before you buy one, it pays to weight the drawbacks against their benefits. Below are the advantages and disadvantages of CNC woodworking machine:


Advantage

  1. Flawless Cutting Accuracy: With its computerized control, a CNC machine can produce multiple identical pieces. It can also produce one-off pieces that conform precisely to programming coordinates. This accuracy saves companies money by reducing waste pieces.


  1. Excels at Intricate Design: CNC machines can execute intricate designs that manual machines can’t. CNC millers and routers routinely perform intricate millwork and cutouts for furniture. In years past, this work was by hand and reserved for premium products. Today, computer controlled machines make it widely available.


  1. Fast Training Process: Due to the physical nature of the operator’s job, a manual woodworking machine can take years to master. Conversely, computer controlled machinery can be mastered in as little as weeks. A CNC machine operator controls its computer, oversees the production process, and performs light servicing – tasks that can be learned through training as easily as through experience.


  1. Excellent Resale Value: As long as it is well maintained, industrial grade CNC machinery retains its value well. With woodworkers constantly on the lookout for quality used machinery, you shouldn’t have difficulty liquidating a machine when you need to upgrade to a new one.


Disadvantage

  1. Expensive to Purchase: An industrial grade CNC machine is at least a five-figure purchase, and many models reach the six-figure mark. For some woodworkers, this means taking out a second mortgage or looking for a quality used machine. In today’s impressive used woodworking machinery market, the latter is the optimal choice.


  1. Costly to Repair: Computer controlled machinery has two components that are costly to repair: sensitive cutter heads and the computer that controls them. Proper training educates CNC operators on the fine points of operating and caring for these elements. But if they malfunction, the repairs can be costly.


  1. Potential for Costly Error: Some companies let CNC machines execute the operator’s instructions while he attends another machine. If the instructions contain an error that isn’t caught, a large run of useless pieces could ensue.


Conclusion

The disadvantages of CNC machines can be reduced or eliminated by proper machine care, careful operation, and the identification of quality used machines. Their advantages can improve the production rate and overall quality of your woodwork.


For many woodworkers, replacing manual machinery with CNC machinery is the beginning of woodworking as a “business.” If you have requirement or need more information of CNC woodworking machines, I recommend you to visit Boarke Machine Co., Ltd. – they are the manufacturer of specializing in a wide range of woodworking machinery. Today, contact with Boarke to get woodworking equipment you need!


Article Source: https://www.rtmachine.com/blog/cnc-woodworking-machines-their-advantages-and-disadvantages/

Scaffolding Best Practices You Might Not Know

The term “little known,” is subjective at best. Many of you being in the construction industry, maybe very well aware of most of these OSHA guidelines for safe scaffolding. What I will try to do in this article is to address both things that are commonly found on any construction site and not so obscure that it would never be utilized.


For starters, any scaffold should have a base of some sort. An “adequate foundation” is what OSHA says that every scaffold must have. There are many different foundations out there; there could be dirt, rock, mud, water, asphalt, grass, a roof, a metal top to a tank or concrete. Scaffolds can be built on catwalks, on the space shuttle and anything else that someone may have to work on.


In other words, you can’t take a frame scaffold and just set it on the ground or even on concrete. It must have a base plate or screw jack at a minimum. Even with a base plate or screw jack, it also needs a wooden mud sill if it’s going to be setting on dirt, gravel, grass etc. The only foundation that does not need a mud sill is concrete. Every other foundation must have a base plate or screw jack and mud sill.


That brings us to screw jack height. This is a common question that many people don’t actually know the answer to. It is suggested many times that a screw jack can only be raised 12 inches. This is actually not correct. Each manufacturer designs his screw jack differently, and some design them so that they can be raised higher than 12 inches. You must check with the manufacturer of the screw jack that you are specifically using. Some are designed to be raised 18 inches and many have a notch or a weld towards the top of the jack which is its maximum raising height and prohibits you from screwing the Jack any higher past that notch.


“It’s close enough.” There’s no such thing as close enough when it comes to getting the scaffold level. Scaffolds must be exactly plum and exactly level for it to be considered safe. Even if the scaffold is only out of level by a very small amount, it is not considered safe. When the scaffold is at a greater height, it will be leaning out of plum at a much greater degree. Cross braces will not go on as easily or at all, and if the scaffold is leaning out of plum and a load is set on top the chances of it overturning are dramatically higher. Every scaffold must be absolutely level.


Platform Construction

One thing that I often see and I’m sure not as many people know as there should be, is that there is only supposed to be 1 inch or less gap between scaffold boards. This is for several reasons, but one main reason is so that small items like wrenches, wall ties, jointers, etc. will not fall through the gap and strike someone below.


Another interesting tidbit about platform construction is that one scaffold board is not permissible to work from. OSHA regulations state that any scaffold must be at least 18 inches wide. There may be exceptions if there was absolutely no other way to erect the scaffold, but you must be able to prove that.


An additional fact that all of our readers should know is that the out-rigger scaffold is supposed to be a maximum of 3 inches away from the wall. Again, it’s for more than one reason, but the main one is because there are no handrails next to your out-rigger facing the masonry wall that you’re working on, therefore they want the wall in front of you and less chance of falling on that side the scaffold.


Here’s one that you may not know; if a board is 10-foot-long or less you cannot have more than 12 inches of the end of the board over it support. Also, if it is a scaffold board greater than 10 feet, you can have no more than 18 inches over its hand support or there must be guardrails so that someone cannot walk out on the end of those cantilevered boards, they tip up and a person falls.


A Couple of Points About Scaffold Access

Any scaffold that requires someone to step up more than 24 inches should have a ladder utilized to access the scaffold. The first rung or bottom rung of the ladder must be a maximum of 24 inches from the ground or walking working surfaces. That height for the first rung is actually quite high, and most people prefer sitting the ladder on the ground so they’re not required to have such a tall first step. Another thing that most people that are reading this are aware of is that the ladder must reach at least 3 feet above the scaffold platform.


Another item that should be noted is that you never increase the scaffold height by adding boxes, barrels, concrete block, brick etc.… to the platform. This includes ladders, such as extension ladders or step ladders. OSHA does allow a ladder to be used on top of the scaffold if many stipulations are met, but this is not a suggested practice.


Guardrail System

In closing we cannot talk about safe scaffolding without bringing up the guardrail system. Every system must include a top rail and mid rail. They should be installed on all open sides of the scaffold. The top rail should be able to withstand 200 pounds of downward and outward force placed upon it. That means if you’re a big fellow and way more than 200 pounds, it’s probably not a good idea to lean all over the handrail.


Another thing that should always be maintained is the proper height of the top rail. OSHA gives a little leeway in the top rail; it can be between 38 and 45 inches in height. Another not so commonly-known allowance is that a cross brace can be used for a mid-rail if the crossing point of the brace is between 20 and 30 inches above the platform and the ends of the cross brace are no more than 48 inches apart.


Now, hopefully you already knew all of this, but as you know, the three steps to remembering are Repetition, Repetition, Repetition!


To have safe scaffolding, I recommend you a professional scaffold manufacturer – Sucoot Co., Ltd... They specialize in manufacturing industrial scaffolding accessories & formwork parts. If you need more information of scaffolding parts, welcome to contact with Sucoot for more details!


Article Source: https://www.masonrymagazine.com/blog/2017/01/01/scaffolding-best-practices-might-not-know/

The Advantages and Disadvantages of Diamond Grinding Wheel

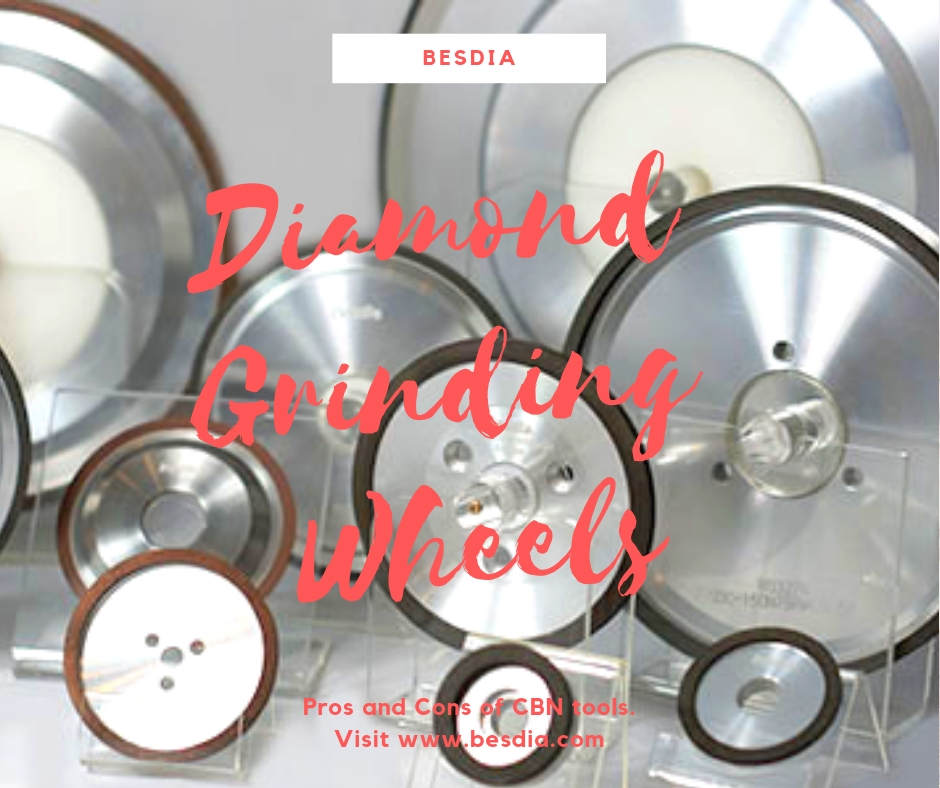
Besdia Diamond Grinding Wheels

Diamond grinding wheels made of diamond or cubic boron nitride (CBN) are widely used in various aspects of the grinding field because of their excellent grinding performance. Diamond grinding wheel is a special tool for grinding hard alloy, glass, ceramics, precious stones and other hard brittle materials.


With the rapid development of high speed grinding and ultra-precision grinding technology, the grinding wheel put forward higher requirements, ceramic and resin bonded diamond has been unable to meet the needs of all production metal bonded grinding wheel due to the combination of high strength, good formability, long life and other significant characteristics in production in the extensive application.


Metal bonded diamond grinding wheels are mainly produced by two types: sintering and electroplating. In order to give full play to the role of abrasive, foreign from the early 1990s began to develop a new type of grinding wheel for high-temperature brazing process, namely the brazed monolayer super hard abrasive grinding wheel, at present the wheel is still in development stage.


Sintered diamond grinding wheel sintered metal bonded grinding wheel more to bronze and other metals as binder, made by the high temperature sintering method, combined with their high strength, good formability, high temperature resistance, thermal conductivity and good wear resistance, long life, can bear larger load.


Because the grinding wheel in sintering process is inevitable in the shrinkage and deformation, so before the use of the grinding wheel must be plastic, but the grinding wheel dressing is more difficult. At present, the grinding wheel which is commonly used in the production process is not only time-consuming and laborious in dressing process, but also the loss of diamond particles is more in the process of dressing.


If you have interest or requirement of diamond grinding wheels, I recommend you to visit Best Diamond Industrial Co., Ltd. – they are the manufacturer of specializing in various diamond and CBN tools. Now, check out their website and contact with Besdia for more details!


Article Source: http://www.jrdiamondtools.com/en/news/2016-7-2/244.html