Sustainable Yarn: The Future of Eco-Friendly Textiles

The article discusses the rising popularity of eco-friendly yarns in the textile industry due to their sustainable production processes and use of environmentally friendly materials. It covers the types of eco-friendly yarns, such as organic cotton, bamboo, hemp, and recycled fibers, highlighting their benefits and sustainable production methods. Additionally, it outlines the diverse applications of sustainable yarns and emphasizes the environmental and ethical reasons for choosing eco-friendly yarns over traditional options.

An increasing number of eco-friendly yarns are gaining popularity as the textile industry moves towards sustainability. These yarns are made from environmentally friendly materials and produced using processes that offer a greener alternative to traditional textiles. Here’s an overview of eco-friendly yarns, their different types, and the reasons behind their growing popularity.

What Are Eco-Friendly Yarns?

Environmentally friendly yarns are made from sustainable materials such as organic cotton, bamboo, hemp, and recycled fibers. Unlike traditional yarns, which often contain synthetic fibers and toxic chemicals, eco-friendly options prioritize the well-being of the planet and its inhabitants. The production of these yarns usually involves less water, fewer chemicals, and generates lower carbon emissions, making them a more environmentally responsible choice.

How Eco-Friendly Yarns Are Made

Eco-friendly fibres are made using sustainable practices and materials, often incorporating recycled fibers, organic materials, or fibers derived from renewable sources.

Main Types of Sustainable Yarns

  1. Organic Cotton: Grown without synthetic pesticides or fertilizers, organic cotton helps reduce environmental impact while providing soft and breathable fabric.
  2. Bamboo Yarn: Bamboo is a fast-growing plant that requires minimal resources. The resulting yarn is soft, breathable, and has natural antibacterial properties.
  3. Hemp Yarn: Hemp is a highly sustainable crop that needs little water and no pesticides. Hemp yarn is durable and strong, making it ideal for various applications.
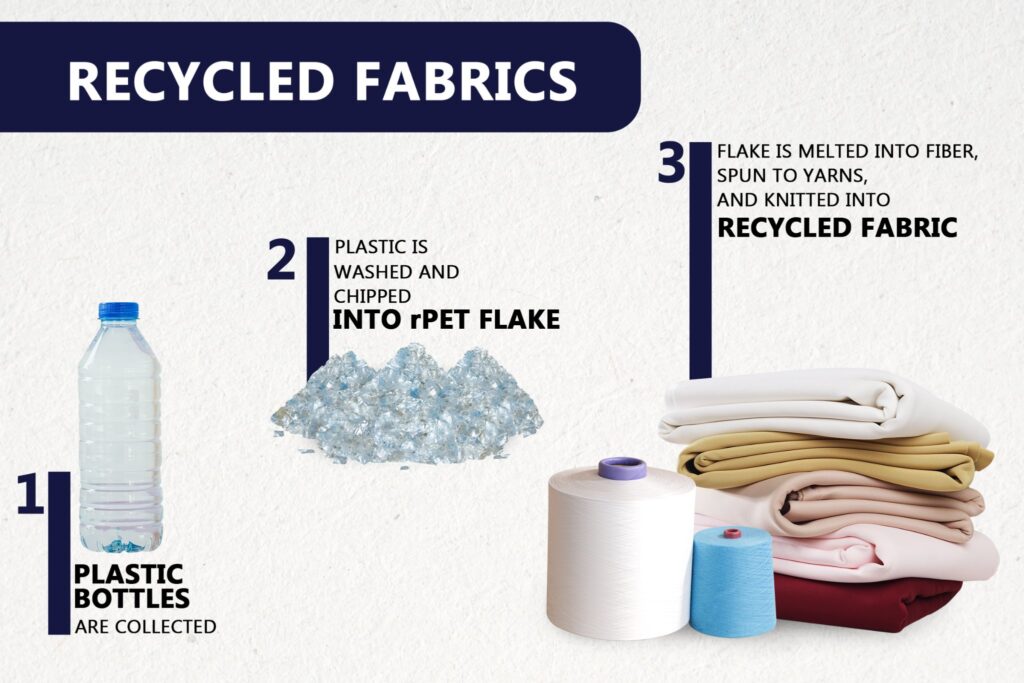
  4. Recycled Fibers: These yarns are made from post-consumer waste, such as plastic bottles or discarded textiles. Using recycled materials helps reduce landfill waste and lowers the demand for virgin resources.
  5. Tencel and Modal: These fibers are derived from sustainably sourced wood pulp and are produced in a closed-loop process that minimizes waste. They are soft, breathable, and biodegradable.
Image from JS Fabric

Applications of Sustainable Yarns

Eco-friendly yarns offer incredible versatility and can be utilized in numerous applications. Ranging from fashion to home textiles, these sustainable yarns deliver the durability and quality essential for everyday use. They are perfect for outdoor and indoor sportswear, military and industrial uses, healthcare textiles, and outdoor furniture. The potential applications are boundless, and the environmental advantages are significant.

Why Choose Eco-Friendly Yarns?

The textile industry is widely recognized as a significant contributor to environmental pollution. Opting for eco-friendly yarns can contribute to a more sustainable future by reducing carbon footprints, minimizing waste, and promoting the use of renewable resources. Sustainable yarns are often produced under fair labor conditions, ensuring ethical practices throughout the supply chain.


ECO Friendly Yarns from Acelon Chemicals & Fiber

Acelon Chemicals & Fiber Corporation: Leading the Way in Sustainable Yarn

Acelon Chemicals & Fiber Corporation is committed to offering various high-quality sustainable yarns to reduce harm to the earth. Their sustainable yarns focus on both wearing durability and environmental impact. Acelon’s product range includes bio-based nylon yarns, dope-dyed yarns, recycled polyester yarns, and more. Each product is designed to meet the highest standards of sustainability and performance.

Explore Acelon’s Environmental Friendly Yarn Collection

Acelon offers a diverse range of eco-friendly yarns tailored to meet different needs:

  • Bio-Based Nylon Yarn (AceEcobio PA410): Made from renewable resources, offering excellent durability and environmental benefits.
  • Dope Dyed Yarn (AceColor®): Reduces water pollution and energy consumption during the dyeing process.
  • Recycled Dope Dyed Color Yarn (AceColor®ECO): Combines the benefits of recycled materials and efficient dyeing processes.
  • Recycled Polyester Yarn (AceEco™ rPET): Made from post-consumer plastic bottles, providing a sustainable alternative to virgin polyester.
  • Recycled Nylon Yarn (AceEco™ rNY): Offers the same strength and durability as traditional nylon but with a lower environmental impact.

Conclusion

Choosing eco-friendly yarns is a step towards a more sustainable and ethical textile industry. By opting for materials that reduce environmental impact, we can make a significant difference. Acelon Chemicals & Fiber Corporation is dedicated to providing high-quality, sustainable yarns that meet the needs of various industries while promoting environmental stewardship.

For more information on sustainable yarns and to explore Acelon’s product offerings, visit their eco-friendly yarn collection page.

Guide of Lining Fabrics: What is Taffeta? The Applications and Benefits

What Is Taffeta?

Many times, the fabric used for these luxurious creations is taffeta, a crisp, stiff fabric with a slight sheen to it. While the name might not be as common as cotton, silk, georgette, chiffon and velvet, taffeta is an important fabric for fashion, soft furnishings and other household accessories.


What Is Taffeta Made Of?

Taffeta was originally made from silk. However, today synthetic fibers such as rayon, acetate, and nylon are also used in the manufacturing process. The fabric is made from a tightly woven plain weave also known as ‘tabby weave’, with very fine horizontal ribs. The warp and weft form a simple crisscross pattern, resembling a checker-board.


There Are Two Types of Silk Taffeta:

  • Piece-dyed taffeta is soft and often used in linings.
  • Yarn-dyed taffeta is stiffer and is used for making evening dresses.


There is also something known as ‘paper taffeta’, an extremely thin and crisp kind of taffeta. The other kinds of taffeta include:


  • Moiré Taffeta: It has a rippled, watermark pattern which may or may not be permanent.
  • Antique Taffeta: A stiff cloth with soft lumps in the yarn.
  • Faille Taffeta: It is woven mostly with staple natural fibers.


The quality of taffeta fabric can be gauged by a simple test—scratch the fabric with your fingernail. If the warp yarn separates it is a loose weave and the fabric may unravel.


What Is Taffeta Used For?

Due to its rich and luxurious feel and appearance, taffeta is used to make wedding gowns, evening dresses, prom dresses, jackets and other kinds of party wear. The stiffer variant of taffeta can also be used to make curtains as the fabric holds its shape when drawn together, thereby enhancing the aesthetics of a room. Other uses of taffeta include lining fabric, insulation, manufacturing umbrellas, handbags, sleeping bags, shower curtains etc. Taffeta was also used to make parachutes during World War II.


Advantages of Taffeta

  • Light weight
  • Rich and luxurious
  • Smooth and shiny
  • Poly-based taffeta is inexpensive


Disadvantages of Taffeta

  • Requires more maintenance
  • Prone to creasing
  • Not breathable


Now that you know what is taffeta, if you have requirement of taffeta lining, come and visit Taiwan Dyeing & Fabric Co., Ltd. also the good ideal. TDF can provide a variety of industrial fabrics and lining fabrics for customers. Today, contact TDF for more details of taffeta!


Article Source: Contrado

Nail Polish Chemistry: How Nail Polish Works and What It’s Made Of

Nail polish is a type of lacquer used to decorate fingernails and toenails. Because it has to be strong, flexible, and resist chipping and peeling, it contains a number of chemicals. Here is a look at the chemical composition of nail polish and the function of each of the ingredients.


Chemical Composition of Nail Polish

A basic clear nail polish could be made from nitrocellulose dissolved in butyl acetate or ethyl acetate. The nitrocellulose forms a shiny film as the acetate solvent evaporates. However, most polishes contain an extensive list of ingredients.


  • Solvents

Solvents are liquids used to mix the other ingredients in a nail polish to yield a uniform product. Once you apply the polish, solvents evaporate away. The amount and type of solvent determines how thick a polish is and how long it takes to dry. Examples of solvents include ethyl acetate, butyl acetate, and alcohol. Toluene, xylene, and formalin or formaldehyde are toxic chemicals that used to be common in nail polish but are found rarely now or in low concentrations. Usually, the first ingredient(s) in a nail polish are solvents.


  • Film Formers

Film formers are chemicals that form the smooth surface on a coat of nail polish. The most common film former is nitrocellulose.


  • Resins

Resins make the film adhere to the nail bed. Resins are ingredients that add depth, gloss, and hardness to the film of a nail polish. An example of a polymer used as a resin in nail polish is tosylamide-formaldehyde resin.


  • Plasticizers

While resins and film formers give polish strength and gloss, they produce a brittle lacquer. Plasticizers are chemicals that help keep polish flexible and reduce the chance that it will crack or chip. They do this by linking to polymer chains and increasing the distance between them. Camphor is a common plasticizer.


  • Pigments

Pigments are chemicals that add color to nail polish. An astonishing variety of chemicals may be used as pigments in nail polish. Common pigments include iron oxides and other colorants, such as you would find in paint or varnish.


  • Pearls

Nail polish that has a shimmery or glittery effect may contain pearlescent minerals, such as titanium dioxide or ground mica. Some polishes may contain bits of plastic glitter or other additives that produce a special effect.


  • Additional Ingredients

Nail polishes may contain thickening agents, such as stearalkonium hectorite, to keep the other ingredients from separating and to make the polish easier to apply. Some polishes contain ultraviolet filters, such as benozophenone-1, which help prevent discoloration when the polish is exposed to sunlight or other forms of ultraviolet light.


As the professional epoxy resin manufacturer, Epolab Chemical Industries Inc. also provides nail polish for customers. Their epoxy nail polishes are colorful, high color saturation and excellent durability which quickly solidified in most of the LED lamps, and qualified full inspection by SGS. If you have interest or requirement of epoxy nail polish, no hesitation, contact with Epolab right away!


Article Source: ThoughtCo.

Bubble Tea Materials: 4 Ingredients of Bubble Tea That You Should Know

Bubble Tea Materials

The bubble tea is made with 4 ingredients:

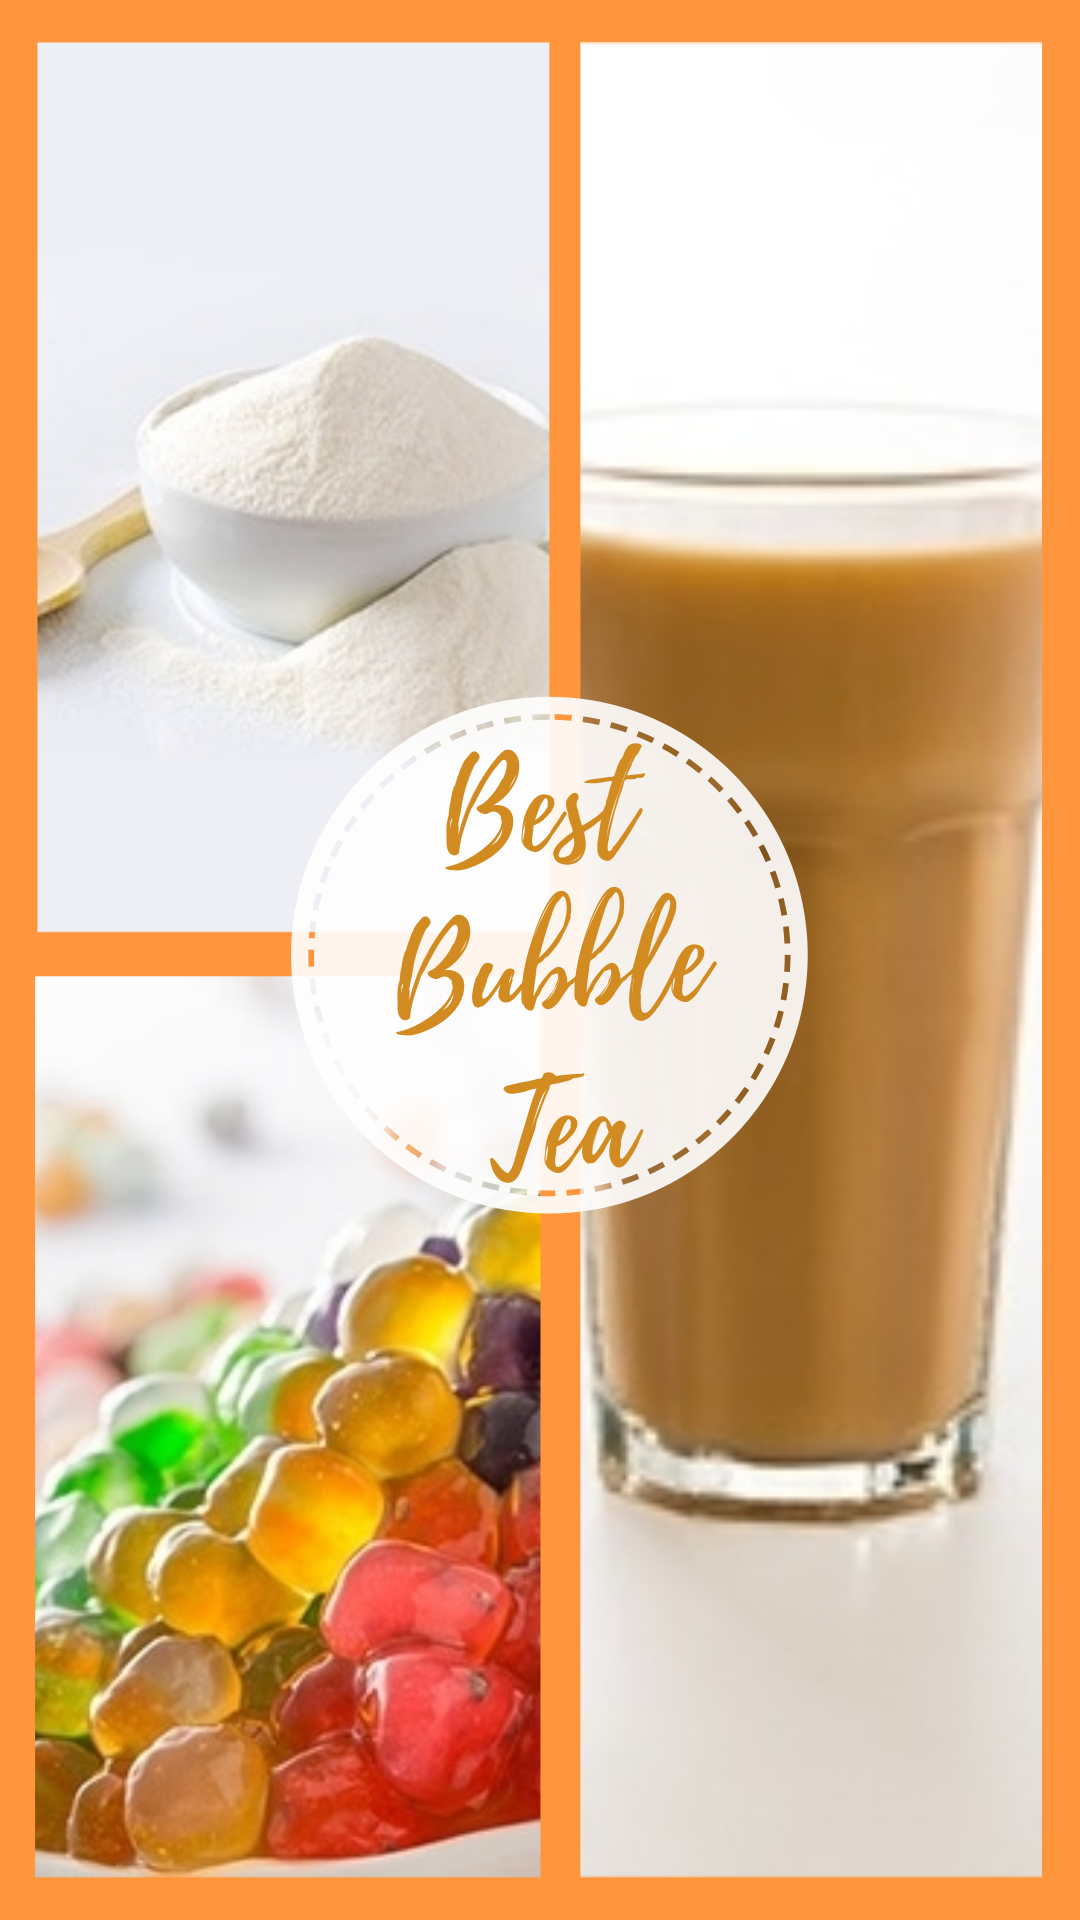
  • Flavor: flavored powder, flavored syrup, fruit purees or fresh fruit
  • Creamer: powder creamer, half-n-half, full milk or other creamer
  • Sweetener: sugar, simple sugar syrup, fructose, or honey. Sugar free sweeteners can be used such as Aspartame, Stevia and Sucralose.
  • Liquid: water, tea or milk


Tapioca Pearls or the “fun” stuff on the bottom adds a new element to the bubble tea beverage. Tapioca is distinctive, chewy and ultimately addicting. Tapioca may be the traditional black or the new colored tapioca pearl. For an added twist, coconut meat can be added for a new flavor dimension.


The Perfect Bubble Tea Experience

Drinking the Perfect Bubble Tea includes the perfect texture of the tapioca bubbles or “Boba.” The perfect texture meaning is not too soft and not too hard. The perfect chewiness is similar to a fresh gummy bear. In addition, the drink should be smooth and tasty. The cool beverages should have a good taste and a refreshing feeling.  The warm beverages should be at the right temperature to warm ones inside. Bubble drinks come in a variety of flavors and textures. Some are made with fresh fruit, some with the Bubble Tea Supply flavored powders and some with the flavored syrups. However the drink is mixed, it should not be watery. There should be a clear and distinct flavor with every drink enjoyed with bubbles or “Boba” to chew down with the drink.


Flavor of Bubble Tea


  • Cream Flavored Powder:

Cream Flavored Powders vary in quality, amount of servings and price. They are separated into A, B&C grades. We recommend the “A” grade due to better taste, texture and cost per serving. “B&C” grades are the most common in the marketplace and are referred to as market grade.


Cream Flavored Powders are created from three main ingredients:

  1. Fruit Flavoring
  2. Creamer
  3. Sweetener


Bubble Tea Supply’s Premium Grade “A” powders have a strong fruit flavoring because the juices of the fruit are used to create the flavor. The percentage and type of fruit flavoring used differs between the Premium Grade “A” and market grades “B&C”. Some of the Premium Grade “A” powders contains as much as 75% of the fruit flavoring. This gives your bubble tea a more natural, real and creamy “fruit” taste. Our market grade “B&C” products have less fruit flavoring, however, still replicates a bit of the real fruit. In our market grade “B&C” products, there is a higher percentage of creamer and sweetener added.


The sweetener that is used also makes a difference in the flavor of the drink.  Premium grade “A” powders have a much more natural taste. Sometimes when lower grade sweeteners are used there may be an artificial taste or even an aftertaste.


An important thing to know about bubble tea flavored powders are the tricks that companies play. Many suppliers will use high concentrations of inert ingredients such as creamer, artificial ingredients, etc. to make their product cost less. This is very deceiving to the customer when trying to compare powders. The best way to compare is to taste the powders sided by side in the exact same measurements.  This is an easy way to know who really has the best product. After you compare our powders to anyone else, we know you will become a lifelong customer.


  • Tea Flavored Powder:

Tea Flavored Powder is created to provide the traditional flavor of tea without the labor of brewing. The tea powder can be used to make a black milk tea or green milk tea bubble tea drink or can be used with the cream flavored powders mixed with water instead of brewed tea. An example of this is to use one scoop of tea powder with water and cream flavored powder instead of brewed tea. We also have infused tea powders with aromas such as lavender and rose. Both are very popular.


  • Gourmet Coffee Powders:

Iced coffee is a very popular drink these days and we have an easy preparation for gourmet coffee drinks. These coffee powders include flavors such as cafe latte and cafe French vanilla.


  • Juice Flavored Syrups:

The Juice Flavored Syrups are a strong thick concentrate used to infuse black or green tea with fruit flavors or for frozen blended bubble tea. Created from the juices of the real fruit, it is hard to tell the difference between fresh fruit and our bubble tea syrups. Some syrup even contains pieces of real fruit in them (i.e. strawberry bits, passion fruit seeds and the like). Most syrup have a sweet and citrus taste, depending on the flavor and provide a light and refreshing taste enhancing the flavor of the tea.


Creamer of Bubble Tea

Although the flavored powder has a milk powder already in the ingredients, using an additional creamer provides body to the bubble tea. We recommend a powdered non-dairy creamer, half n’ half, or milk.


  • Powdered non-dairy creamer is available in a variety of brands and seems to fulfill the same taste and body to bubble tea. This is the most common form of creamer used in most bubble tea shops.


Some prefer not to use the non-dairy creamer as it sometimes is more difficult to dissolve in the drink. To get rid of the bits of creamer when preparing the bubble tea, use a warm liquid to dissolve the powders first. Another option if warm liquid is not available is to make sure that the drink is shaken really well. Vigorous shaking will ensure the powders are fully dissolved.


  • Half n’ half is another option and adds a thicker body to the drink. When using half n’ half, your bubble tea will taste more like ice cream or a milk shake. Using half n’ half makes the bubble tea rich in flavor and is a favorite among coffee drinkers.


  • When using milk, whole milk is suggested. Milk gives your bubble tea a more naturally creamy taste and texture. The thickness of your bubble tea may become thinner. If making a blended bubble tea with milk as a creamer, the drink replicates a fruity milk shake.


Sweetener of Bubble Tea

While the flavored powder already has a sweetener included in its mix, it is recommended to add a bit more sweetener to your bubble tea. These are the most commonly used sweeteners.


  • Using white or brown sugar is preferable. These are normally made into simple sugar syrup. The sweetness brings out the fruit flavoring more when the drink is at a cold temperature. Cane sugar and simple sugar syrup is the most recommended sweetener as it adds a more natural taste and adds the perfect sweetness in the bubble tea.


  • Fructose is also very popular. Fructose is a sweetener that is taken from the juices of fruits. Fructose provides the bubble tea with a thicker body, yet has a different taste. Fructose is preferred by shops catering to those with sugar sensitivity. Fructose is typically less expensive than pure cane sugar syrup.


  • Honey can be used to provide a lighter sweetness to the bubble tea. Once again, the taste and texture are different but preferred by some. Honey can also be used to sweeten the tapioca pearls.


Liquid – “T-E-A” in Bubble Tea:

Although the drink first originated from a mix of real tea and fruit flavoring, this fun drink has recreated itself to being known as a tea, coffee, or smoothie with tapioca on the bottom known as “bubbles.”


Adding tea to the drink is not recommended for all of the flavors. Of course, depending on the taste preference of the customer, you will want to satisfy their taste buds. Black and Green Jasmine Teas have a refreshing sweet taste when flavored syrup or juice flavored powders are shaken with simple sugar syrup. Black milk tea powder can be substituted for brewed tea.


The cream flavored powders create the best flavored bubble tea when shaken with filtered water, creamer and simple sugar syrup. Milk can also be substituted for the water and creamer.


Texture of Bubble Tea

Tapioca Pearls or the “fun” stuff:


The texture of the tapioca pearl is one of the most important parts of making a Perfect Cup of Bubble Tea. There are two colors available, the traditional black tapioca pearl and the new colored tapioca pearl that comes in pastel colors. As another “fun” option, coconut meat with a gelatin-like texture can also be added to the bottom of the bubble tea. Coconut meat is also fun to suck up through the fat straw and will tantalize your taste buds with flavors such as lychee and pineapple.  Coconut meat can be used in addition to tapioca or as an alternative.


There are also two types of tapioca pearls available, the semi-cooked tapioca pearl and raw tapioca pearl. The semi-cooked tapioca pearl in its uncooked state is harder making it more resilient to shipping. The preparation time is about 10 minutes less than the raw tapioca and an unopened bag of semi-cooked tapioca will have a slightly longer shelf life. The downside to semi-cooked tapioca is that the pearl is not as chewy as the raw tapioca. Semi-cooked tapioca also loses its chewiness faster than the raw tapioca.


Bubble Tea supply sells raw tapioca in its highest quality to insure you serve the Best Tapioca Pearls. The raw tapioca pearl is recommended because the texture is chewier and will stay chewy longer. You will notice after opening the bag that the raw tapioca pearl is very delicate. If pinching a pearl between two fingers, the pearl breaks easily into powder.


While preparing the tapioca pearl, you want to decide if you would like to serve your pearls harder or soft. Tapioca pearls are served at different consistencies worldwide, and are usually done on preference. It should have a good texture though, not too hard (like an old gummy bear) and not too mushy (like a Juju Bee candy). You can follow our Virtual recipe book under the recipe section to prepare your tapioca pearl at the suggested texture.


When comparing Bubble Tea Supply tapioca pearl with the competition, you’ll notice that Bubble Tea Supply tapioca pearls hold together well throughout the day while retaining a chewy texture. It is not recommended to reuse left over tapioca pearls, as your customers will notice a difference in texture. We compare the tapioca to fried chicken. Fried chicken is very good when it’s first cooked but if you try to serve it the following day it isn’t the same. The same goes for tapioca. If it’s your customer’s first experience with “old tapioca” Bubble Tea, it may be their last!


If you want to find an excellent bubble tea materials supplier, I recommend that you can visit Empire Eagle Food Co., Ltd. – they not only provide bubble tea materials but also tea shop training program. Learn more details, please do not hesitate to contact with Empire Eagle.


Article Source: http://www.bubbleteasupply.biz/bubble-tea-components

12 Surprising Uses for Safety Pins

Sick of losing socks? Afraid you’re going to mess up that birthday cake? Want to keep pickpockets at bay? The humble safety pin is the answer to your troubles! Click through for some fantastic ways to use safety pins that go beyond the basics. Have a great use of your own? Share it in the comments.


Great Ways to Use Safety Pins:


  • Keep Your Bag Safe From Thieves:

Safety pin your zippers onto the fabric on bags and backpacks — it’s just one more hassle for pickpockets to go through to get to your belongings. Trust me, every extra second is important!


  • Keep Your File Cabinet Nice and Tidy:

Is there one huge, bulging hanging file in your file cabinet? Save space with a safety pin.


  • Keep Pairs of Socks and Gloves Together:

Genius, isn’t it? Never lose another sock again!


  • Keep Those Curtains Shut:

Sick of that tiny space between your curtains? Keep them shut with your trusty pal, the safety pin, and keep living like a vampire!


  • Clean Your Garlic Press:

I have a wonderful garlic press that’s sadly lost its comb. Luckily, all is not lost — a safety pin works just as well (if not better!) for getting out the entire gunk.


  • Clean Your Salt Shaker:

Stop all that salt buildup in the shaker by cleaning it with a safety pin.


  • Keep Those Covers on the Couch:

If your armchair covers just don’t like to stay in their place, fasten them down with a safety pin.


  • Decorate a Cake:

Don’t just eyeball those words and other designs on a cake! Use a safety pin to plan out your design — the icing will cover the safety pin lines completely.


  • Fix a Drawstring:

One of the most frustrating problems ever, solved!


  • Use in Place of a Clothes Pin:

Run out of clothespins? Safety pins will work in a pinch.


  • Make a Key Chain:

For a quirky key chain, place your keys on a large safety pin.


  • Stop Static Cling:

Sick of your skirt sticking to your tights? Fasten a small safety pin to the skirt lining or your slip. The metal in the safety pin will conduct electricity and divert the static!


If you have any interest in safety pins, I recommend that you can visit the website of Shuen Fuh Enterprise Co., Ltd. – the company provides colorful safety pins for customers. Their factory is equipped with the state-of-the-art equipment to develop and manufacture high quality safety pin products in assorted sizes, styles, and shapes for your applications. Feel free to contact with Shuen Fuh for more details.


Article Source: https://www.care2.com/greenliving/15-surprising-uses-for-safety-pins.html

Athletic Compression Socks: Does It Really Work?

You have probably seen people at races or running around the streets that have those athletic compression socks or sleeves on. Maybe you have thought to yourself, “Do those really work?” or “I wonder if those would help my shin splints or calf cramps?”


During this time of year, with the start of cross country season and with fall marathons and half marathons creeping up on us, I get a lot of questions about compression. Most commonly, people want to know how it works and if it’s appropriate for their condition. Today, I will explain the concept behind compression, how it can benefit you, and which conditions it’s appropriate for.


To really understand how athletic compression socks and sleeves work, it’s important to have a basic understanding of how blood flows through the body. The heart pumps oxygen containing blood to our extremities and working muscles though arteries. Once the cells use the oxygen and other nutrients from the blood, the then deoxygenated blood, along with lactic acid and other waste products enter the veins to get taken back to the heart. Once the blood gets back to the heart, it’s oxygenated from the lungs and the process is repeated.


Keeping oxygenated blood flowing to muscles is important for performance. The more oxygen the cells have, the better they will function. During exercise, the body produces lactic acid as a waste product. If this lactic acid is not removed from the muscles, it can contribute to soreness and decreased ability to perform. Another factor in decreased performance is muscle fatigue. Muscular vibration during physical activity contributes to fatigue. Think about how much shock and vibration is going through your leg muscles as you pound pavement with 3-5 times your body weight while running. Over time, those little vibrations of the muscles add up and they become fatigued.


Now that we know what the blood and muscles are doing while we are running, let’s talk about what athletic compression socks and sleeves do to help the body. Compression socks and sleeves provide graduated compression, meaning the compression is higher (tighter) at the foot and ankle and lower (looser) as it moves up the calf and lower leg. This type of compression helps to fight the effects of gravity and assist the body in venous return (deoxygenated blood flowing back up to the heart).


Recent studies show that with an optimal level of consistent compression, the walls of the arteries will dilate and increase the blood flow through them. Arterial blood flow has been shown to increase up to 40% during activity and 30% during recovery. This means more oxygen and nutrients flowing through the body! On the other hand, the walls of the veins will constrict under compression, which helps to increase the velocity of blood flow through them. Increased velocity of blood flow through veins means that deoxygenated blood and lactic acid will get back to the heart quicker, which will help to increase the rate of recovery and decrease muscle soreness! Compression will also help to stabilize the muscle and decrease the amount of muscular vibration, resulting in decreased fatigue. To sum up the benefits of compression: enhanced performance through increased blood flow, quicker recovery and decreased muscle soreness, and less fatigue. All good things!


So are compression socks or sleeves good for shin splints, calf cramps / strains, and Achilles tendonitis? The answer is yes, however, they will not cure any condition if the only thing you are doing to help your injury is wear compression. All injuries should be assessed so that the real cause can be addressed. Wearing compression can help to make your injury feel better as you are recovering, help get you through that last long run before your marathon, or possibly prevent a new injury from coming on. Proper rest, massage, stretching / strengthening, footwear, and progression of training should all be considered when dealing with a lower leg injury.


What if you’re not injured, can you still benefit from compression? Absolutely! Increased blood flow is going to help improve your performance and decrease the rate of fatigue of your muscles. It will also help you to recover quicker, meaning that you will be ready for your next workout, so you can train harder.


Should I wear socks or sleeves? The answer to this question depends on a few things. If your injury involves your arch, ankle, or lower Achilles tendon, you are going to want to wear a sock to cover the injured area. If your injury is up higher, a sleeve should be fine. Another factor to take into consideration is what type of sock you like to wear. If you have a favorite pair of running socks that you can’t run without, you will probably like the sleeve better since you can wear your favorite socks with it.


If you are going to be using the compression product for recovery, you should wear the sock. Remember that graduated compression that we talked about and the effects of gravity? You don’t want to have a huge swollen foot and ankle because the blood couldn’t flow past the tightness of the lowest part of an athletic compression sleeve. Wear the sock and the graduated compression will work in your favor of keeping the foot and ankle in good shape.


Don’t forget about wearing compression while you travel to and from your race or on a business trip. Sitting in a plane or car for an extended period of time can wreak havoc on the blood flow in our legs. Let compression assist your veins in getting that blood out of your legs and back to your heart!


Whether you are trying to ease the symptoms of shin splints or calf pain, or looking to get an edge on the competition through quicker recovery, compression can help!


If you want to get more information about athletic compression socks and sleeves, I recommend that you can visit Footland Inc. – the company is a professional socks manufacturer in Taiwan. You can find a variety of high quality socks including hiking socks, skiing socks, marathon socks, waterproof socks, etc.


Article Source: http://www.fleetfeethartford.com/sports-medicine/sports-medicine-corner/compression

An Introduction to Unmanned Aircraft Systems

Unmanned Aircraft
Unmanned Aircraft Systems (UAS) are a new and evolutionary component of the aviation system, offering several new and exciting opportunities, as well as a number of challenges.


Unmanned aircraft come in a variety of shapes and sizes, ranging from small handheld types up to large aircraft, potentially a similar size to airliners and, just like manned aircraft, and they may be of a fixed wing design, rotary winged, or a combination of both.


Unmanned Aircraft may also be referred to as:


  • Drones
  • Remotely Piloted Aircraft Systems (RPAS)
  • Unmanned Aerial Vehicles (UAV)
  • Model Aircraft
  • Radio Controlled Aircraft


Regardless of the name used, they all share the common characteristic that the person responsible for piloting the aircraft is not onboard it. Just like any other aircraft however, an unmanned aircraft must always be flown in a safe manner, both with respect to other aircraft in the air and also to people and properties on the ground.


Types of Operation

The key first principle when discussing the regulation of any UAS is to determine how it is being operated and what process is being used to avoid it colliding with other aircraft, objects or people, which is the primary responsibility of anyone who flies any aircraft.


UAS are either operated:


Within the Visual Line Of Sight (VLOS) of the person flying the aircraft

This means that the aircraft must be able to be clearly seen by the person flying it at all times when it is airborne. By doing this, the person flying the aircraft is able to monitor its flight path and so manoeuvre it clear of anything that it may collide with.  While corrective spectacles can be used to look at the aircraft, the use of binoculars, telescopes, or any other image enhancing devices are not permitted.


In simple terms, the aircraft must not be flown out of sight of a human eye.


Beyond the Visual Line Of Sight (BVLOS) of the person flying the aircraft

If the person flying the aircraft is unable to maintain direct unaided visual contact with it while it is airborne, then an alternative method of collision avoidance must be employed in order to ensure that it can still be flown safely.


BVLOS flight will normally require either:


  • A technical capability which is equivalent to the ability of a pilot of a manned aircraft uses to ‘see and avoid’ potential conflictions – this is referred to as a Detect and Avoid (DAA) capability
  • A block of airspace to operate in which the unmanned aircraft is ‘segregated’ from other aircraft – because other aircraft are not permitted to enter this airspace block, the unmanned aircraft can operate without the risk of collision, or the need for other collision avoidance capabilities
  • Clear evidence that the intended operation will have ‘no aviation threat’ and that the safety of persons and objects on the ground has been properly addressed.


What Is The Purpose of Your Flight?

Your flight will broadly fall into one of three types as follows:


  • Recreational – where the flight is being conducted as a pastime purely as an ‘enjoyment’ or sporting activity
  • Commercial – where the flight is being conducted for business purposes in return for specific remuneration or other form of valuable consideration.
  • (a specific definition of a commercial operation is contained within the ‘Commercial Operations with Small Drones’ section)
  • Private/Non-Commercial – flights that are either:
    • not considered to be recreational
    • flown for business purposes, but without any remuneration or other valuable consideration being involved


While the regulations are the same for all types of flight, there are some specific additional requirements placed on commercial operations involving small unmanned aircraft.


If you want to learn more information about unmanned aircraft systems, please do not hesitate to visit Carbon-Based Technology Inc. – the company is specializing in unmanned aircraft / unmanned aerial system. Get more details, welcome to send inquiry to let Carbon-Based know your demands.


Article Source: https://www.caa.co.uk/Consumers/Unmanned-aircraft/Our-role/An-introduction-to-unmanned-aircraft-systems/

Permanent Makeup Vs Microblading – What’s The Difference?

When it comes to waking up with the perfect eyebrows to envy all others, there are two techniques that are used in the industry; traditional Permanent Makeup and Microblading. But what’s the difference between the two techniques and what fabulous results can each treatment offer? Read more below:


Permanent Makeup

Permanent makeup is the most common phrase used but terms such as Micropigmentation and permanent cosmetics are also used to describe the same procedure. For permanent eyebrows, as well as lip and eyeliner treatments, a cosmetic tattooing machine is used to gently implant pigment into the skin using a variety of fine needles. It’s different from a regular tattoo machine in that the frequency is much lower meaning the pigment is implanted closer to the surface. Some would say the sensation feels like an electric toothbrush pressed against the skin; a little uncomfortable but not too painful.


There are a variety of looks you can opt for when choosing your permanent makeup treatments. If it’s a dramatic powder brow you are looking for to mimic the look of makeup, you’ve got it. If it’s more realistic brows you’re looking for go for a procedure using individual strokes to create your desired brow shape, go for it. You can also opt for bright lips, natural lip blush, subtle lash enhancement or feline Latino eyeliner flicks – the choice is yours!


K.B Pro Brows: Microblading

Microblading is a slightly different technique that’s still firmly in the tattooing family, meaning pigment is implanted into the skin, but a precision hand tool is used instead of a machine. The beauty of microblading is that the hair-like strokes you can achieve are so fine that it’s the most hyper-realistic treatment yet, it’s no wonder that it’s often referred to as ‘eyebrow embroidery’.


A microblading technician meticulously draws each hair stroke onto the skin to follow the direction and length of the existing hairs. If there are no hairs present, not to worry, a skilled technician can create beautiful brows that suit your face shape and mimic that of a natural brow. The channels created by the microblading technique are closer to the surface then when using a machine and the needles used are even sharper, meaning even more precise and finer hair strokes can be created. If you want the most natural looking treatment that no one could ever guess you’ve had, this is ‘the’ treatment to go for.


Learn more information about permanent eyebrow makeup and permanent makeup machines, try to visit BELLA Co., Ltd. – the company is specializing in kinds of permanent makeup devices and accessories.


Article Source: http://www.karenbetts.co.uk/blog-post/24-permanent-makeup-vs-microblading–whats-the-difference.html

4 Ways to Make Your Own Hand Embroidered Patches

DIY Embroidered Patches

Want to add some personal style to your favorite denim jacket or bag? Buttons, pins, badges and patches are a fun and popular way to do that, and DIY embroidered patches are so easy to make!


You can find embroidered patches available to order online–there are so many to choose from–but the beauty of making them yourself is that you can have any design you want. Plus, you can personalize them!


This tutorial will walk you through four methods for making and attaching your handmade patches. For each of these, choose patterns based on how large you want the patches to be. There’s no rule for this, but smaller designs, such as the elements in the fruit pattern, work well.


While there are four distinct methods for making patches, you’ll find that you can mix and match some of the techniques. For example, you can make a felt patch with adhesive, or a pin with different edge stitching. Have fun experimenting with these four DIY patch making processes!


Iron-on Patches Step 1

Iron-on patches are fast and easy to attach, which is always helpful. Plus, you can give these patches as gifts. Just include some simple iron-on instructions!


Instructions for Iron-on Patches

  • Choose a pattern, marking it with the transfer method that works best for the fabric you’re using. Stitch the design, leaving room around the edges. Cut a second piece of fabric to a similar size, as well as two pieces of paper-backed fusible web.
  • Iron one piece of fusible web to the non-embroidered piece of fabric. Be sure to follow the manufacturer’s instructions, and watch that you place your iron on the paper side.


Iron-on Patches: Step 2


  • Peel the paper off the fusible web and place the fabric, web side down, on the back of the embroidered fabric. Iron the non-embroidered piece to fuse the layers together. This will give your patch more stability and help prevent the edges from fraying.
  • Iron the second piece of fusible web to the plain back of your fused patch and remove the paper.


Iron-on Patches: Step 3

  • Cut around the embroidered shape, following the lines of the motif and leaving some space around the embroidery.
  • The fusible web will help prevent fraying, but you can also stitch a line of running stitch near the edge to add extra insurance against fraying. Plus, it looks cute! To make your patch look more like those that are commercially made, use whip stitch around the edge as shown in the pin patch tutorial below.
  • When you’re ready to attach your iron-on patch, hold it in place and iron the patch from the back of the item you’re attaching it to. Make sure your iron is on a high enough setting for the heat to get through the layers.
  • If you are attaching this to an item that will be washed regularly, you may want to wait and add the line of stitching after it’s ironed in place.


Felt Sew-on Patches

This patch style requires minimal edge finishing because the felt won’t fray like other fabrics. It’s also sewn in place, so you know that your stitching won’t go anywhere!


Instructions for Felt Sew-on Patches

  • To embroider on felt, mark the pattern with water-soluble stabilizer or the tracing paper method. Be sure to arrange the embroidery so that there is ample space around the design for trimming the patch.
  • Embroider the pattern however you like. Satin stitching looks great on small patches, but you can also stick to all outlines.
  • When the embroidery is done, remove the markings.
  • If you used the tracing paper method you will need to carefully tear away the paper. For the water-soluble stabilizer method, soak the finished stitching and when the material dissolves, let the felt dry flat.
  • If you are using wool or wool blend felt (which hold up the best), it is very important that you use cool or room temperature water when you soak the embroidery. Warm water will cause your patch to shrink.


Felt Sew-on Patches: Step 2

  • Finish the patch by cutting around the embroidery.
  • You can loosely follow the shape of the stitching as shown or cut out a regular shape, such as a circle or hexagon.
  • The sample has nearly 1/4″ of the felt showing so there is plenty of space for sewing the patch onto something. But you can cut much closer. Just be sure that you don’t cut the stitches or trim the felt so close that the stitches fall out.


Felt Sew-on Patches: Step 3

  • To attach a patch, pin or hold the patch in place where you want it.
  • Stitch around the edge with regular embroidery floss. You can use blanket stitch or whip stitch, as you would with appliqué.
  • Felt patches shouldn’t be washed frequently. When they do need to go through the laundry, use the gentle cycle or place the patched item in a delicate bag or pillowcase.


Self-Adhesive Patches

Want a permanent patch that you can attach like a sticker? This is the method for you!


Instructions for Self-Adhesive Patches

  • Transfer your pattern onto any fabric that you like stitching on. Placing the design on the bias of the fabric prevents excess fraying later.
  • Cut a piece of stiff, heavy stabilizer and layer it behind the fabric as you place it in your embroidery hoop. Stitch the pattern through both layers. Getting through the stabilizer can take effort, so be sure to use a strong needle.


Self-Adhesive Patches: Step 2

  • Trim around the embroidered shape, leaving a bit of space for stitching the edges. For this method of patch making, cutting more geometric shapes is best.
  • Stitch around the edges of the patch with whip stitch or blanket stitch.


Self-Adhesive Patches: Step 3

  • Use permanent peel and stick fabric adhesive on the back of the patch. This material comes in sheets or on a roll as shown. Cut a single piece or strips to fit the patch within the stitched edges.
  • To attach the patch, peel off the self-adhesive backing and press the patch onto your backpack or even a notebook. Just remember that this type of adhesive is permanent, so removing your patch could prove quite tricky!


Removable Pin Patches

For those times when you want to sport a patch temporarily, why not make a pin that looks like a badge? This method is also great for gift-giving!


Instructions for Removable Pin Patches

  • Transfer your embroidery pattern onto fabric and stitch the design. In this example, the fabric provides some fill color for the embroidery.
  • Cut around the stitching, leaving 1/8″ to 1/4″ depending on how much of the edge you want to show. Cut a piece of felt that matches the shape of the embroidered piece.
  • On the back of the felt piece, sew a bar-style pinback. Be sure that you’re stitching on the correct side of the felt so that they will match up when the wrong sides of the pieces are facing each other.


Removable Pin Patches: Step 2

  • Hold or pin the two layers together and, using three strands of embroidery floss, start whip stitching around the edge. Hide the starting knot between the layers, coming out the back.
  • Go down through the front to the back, making the stitches very close to each other. They should look like satin stitch.
  • When you run out of thread, tie it off with a knot close to the felt, thread the needle through a few stitches on the back and trim the thread. Start your new thread just as before.
  • Attach your new pin to a jacket, and then move it to a bag, to a sweater and more!


If you like or need more information about embroidered badges, I recommend that you can visit the website of Dah Jeng Embroidery Inc. The company provides kinds of embroidery items including embroidered patches, 3D embroidery, embroidered emblem, chenille patches, sublimation transfers, etc. Learn more details, welcome to click here: www.embroidered-badge.com/embroidery-patches.html


Article Source: https://www.thespruce.com/diy-embroidered-felt-patches-4047059