How to Choose the Right Oil and Grease for Your Equipment

With the Environmental Protection Agency (EPA) emissions regulations, the use of higher-grade engine oil is mandatory to maintain proper engine performance. A benefit of the newer oils is that they’re compatible for use in earlier engines.


There are two characteristics to look for when choosing the right engine oil for your compact equipment: classification and viscosity rating.


Oil Classifications

Oil categories for use in diesel engines begin with “C.” The American Petroleum Institute (API) CJ-4 category was introduced in 2006 and was intended for high-speed, four-stroke diesel engines. It was designed to meet 2007 model year on-highway exhaust emission standards, and is uniquely formulated to avoid impacting new diesel engine technology durability.


In December 2016, API introduced a new heavy-duty oil engine category: CK-4. The new formulations help protect engines from high-heat, high-load conditions typical in non-road applications. CK-4 oils are backwards compatible with all trucks and non-road equipment that use CJ-4 oils.


Always use premium oil that meets or exceeds the API service classification of CK-4 for EPA-compliant engines.


Viscosity Matching

It’s important to properly match the viscosity rating of your engine oil to the outside temperatures at your work environment. Always refer to the Operation & Maintenance Manual to determine the weight of oil that is recommended in various conditions.


A 10W-30 weight oil is a common factory-fill for many current production machines. It offers top performance in temperatures typically ranging from zero degrees F to 90 degrees F and above. A 15W-40 weight performs well from 25 degrees F to 110 degrees F and above.


Synthetic or synthetic-blended oils are formulated with additives that can extend oil change intervals and promote longer engine life. A 5W-40 weight synthetic oil is usually capable of providing protection in harsh conditions as cold as minus 40 degrees F and as hot as 120 degrees F.


Hydraulic and Hydrostatic Oils

Hydraulic and hydrostatic oils are formulated to meet the growing demands placed on hydraulic components, and there are several different types of these fluids for various applications:


  • High-performance — Typically, a custom blend of high-quality lubricants designed to provide peak flow at subzero temperatures while maintaining stability during periods of high-temperature use.
  • Synthetic — An advanced liquid technology designed to optimize cycle times and productivity, and provide good cold weather fluidity for seasonal changes.
  • Biodegradable — Introduced to meet customer demand as federal, state and local governments set environmental-related project restrictions. It’s biodegradable, non-toxic and formulated to reduce the potential for environmental damage.


Grease

Many machines require grease as a lubricant in pivot points where pins and bushings are located. The lubrication points need greased at various intervals specified by the machine manufacturer. If used correctly, the right type of grease will help extend the life of components:


  • Multi-purpose #2 — Developed for normal applications, it provides lubrication to prevent rust and corrosion and protection under heavy and shock loads.
  • Heavy-duty — Containing moly for better adherence to all surfaces, it offers water resistance, extreme pressure capabilities, pump ability in cold temperatures and good seal compatibility.
  • High-performance — Formulated to provide high-temperature performance in severe operating conditions, it’s intended for lube points with sliding and pivoting movements.


In view of above, if you want to choose the right engine oil and grease, I recommend that you can visit the website of Min Jung Hong. They are the professional manufacturer of specializing in high performance motor oil, heavy duty machinery oil, agricultural lubricants, MoS2 grease, fuel injector cleaner and more. Learn more information about lubricant and oil, try to check out Min Jung Hong’s product pages and feel free to send inquiries to them.


Article Source: https://blog.bobcat.com/2015/01/how-to-choose-the-right-oil-and-grease-for-your-equipment/

How to Make Beaded Safety Pin Jewelry

Why Safety Pins Are A Fashion Staple


Safety pin jewelry doesn’t sound super sophisticated, but even the high fashion world has embraced the trend. For years, safety pins have cycled in and out of style, which makes them an accessory staple. Fortunately, you don’t have to spend hundreds of dollars on a couture version of the look, nor do you have to go bare bones with safety pins like the punk rockers that sported them in the 1970s and ’80s did.


For just a few bucks, you can make your own beaded safety pin jewelry, be it a pair of earrings, a necklace or a bracelet.


It’s a fun and easy craft to make and even more fun to wear. With these instructions, you’ll transform an ordinary safety pin into a fashion statement. It’s as simple as slipping some seed beads onto the pins. They make great gifts for tweens and teens or for the adult who’s perpetually young at heart.


The Supply List

The supply list for safety pin jewelry is pretty simple. In addition to the pins and the beads, it is helpful to have needle-nose pliers and a small flat-head screwdriver. You can find all of these items at a chain craft store like Michael’s. Art supply stores also carry these goods.


How Many Safety Pins Do You Need?

How many safety pins you’ll need depends not only on the pattern you choose but also on the kind of jewelry you want to make. The typical safety pin jewelry project will require between 10 and 14 small pins.


From there, you can open the pin, and slip the seed beads onto it. Once all beads are in place, close the safety pin. You may want to use the needle-nose pliers to pinch the end of the safety pin so it will not pop open later. Repeat this step until all the safety pins are beaded.


Connecting the Small Pins to One Big Pin

Now you are ready to put all the beaded pins onto a larger safety pin.


Open the large safety pin (the size you need that will be stated in the pattern you choose). Use the flat-head screwdriver to slightly pry apart the coils at the end of the large pin.


Slip the loop of the first beaded safety pin onto the large one. Pull it down to the loop at the base of the large pin. Pull it around the loop and up through the backside of the pin. Repeat this for each beaded safety pin.


Once all your beaded safety pins are on your larger pin, use the pliers and squeeze the loop to close it. You can now affix your new safety pin jewelry to your shirt, hat, shoelaces, etc.


Shuen Fuh Enterprise Co., Ltd. provides kinds of safety pins for customers. Their factory is equipped with the state-of-the-art equipment to develop and manufacture high quality safety pin products in assorted sizes, styles, and shapes for your applications. If you are interested in learning more information about safety pins, welcome to visit Shuen Fuh’s website to browse more relative products.


Article Source: https://www.thespruce.com/beaded-safety-pin-instructions-1243897

The Ultimate Guide to Plastic Recycling

Plastic is among the most popular and important materials used in the modern world. However, its popularity is part of the huge problem and reason why plastics should be recycled. Instead of throwing them away polluting the land and our water bodies, we can optimize the lifespan of plastics by recycling and reusing them.


Plastic recycling refers to the process of recovering waste or scrap plastic and reprocessing it into useful product. Due to the fact that plastic is non-biodegradable, it is essential that it is recycled as part of the global efforts to reducing plastic and other solid waste in the environment.


Process of Plastic Recycling


The following is a step by step process of plastic recycling:


  • Collection


Plastics are available in a number of forms for example plastic containers, jars, bottles, plastic bags, packaging plastic, big industrial plastics just to mention but a few. Due to their nature and availability, there are plastic collection centers and some business people have ventured into plastic collecting business as a source of income. Tons and tons of scrap plastic are collected and sent to a collecting yard where they are then packed and transported to plastic processing plants. Unfortunately, not all countries have the capacity to recycle plastic. Very few developing countries can actually recycle plastic. This means that, plastic waste is still a major problem to some countries in the world.


  • Sorting


The actual plastic recycling process starts with sorting of the different plastic items by their resin content and color. This process is also done to ensure all contaminates are eliminated. There are specially designed machines that help in sorting of the plastics according to their resin content. Then the recycling mill sorts the scrap plastic by symbols at the bottom of the plastics.


  • Shredding


After sorting the plastics, the next step is to cut the plastics into tiny chunks or pieces. The plastic bottles and containers are then ground and cut into tiny pieces or flakes. The heavier and lighter plastic flakes are separated using a specially designed machine. The separation process helps in ensuring that the different plastics are not put together or mixed up in the final product. Remember that different plastics are used to make different items.


  • Cleaning


After a complete separation, the flakes or chunks are then washed with detergents to remove the remaining contamination. Once the cleaning process is complete, the clean flakes are passed through specialized equipment that further separates the plastic resin types. The plastic flakes are then subjected to moderate heat to dry.


  • Melting


The dry flakes are melted down. They can be melted down and molded into a new shape or they are melted down and processed into granules. The melting process is done under regulated temperatures. There is specialized equipment designed to melt down plastic without destroying them.


  • Making of pellets


After the melting process, the plastic pieces are then compressed into tiny pellets known as nurdles. In this state, the plastic pellets are ready for reuse or be redesigned into new plastic products. It is important to point out that recycled plastic is hardly used to make identical plastic item or its previous form. It is in this pellet form that plastics are transported to plastic manufacturing companies to be redesigned and be used in making other useful plastic products.


Advantages of Recycling Plastics


Plastics should be recycled because of a number of reasons as can be seen below:


  • Provision of a Sustainable Source of Raw Materials
  • Reduces Environmental Problems
  • Reduces Landfill Problems
  • Consumes Less Energy
  • Encourages a Sustainable Lifestyle among People


In summary, any sort of effort aimed at saving the environment is very important and matters a lot. Since its inception during the environmental revolution in the late 1960s, plastic recycling is one of the most encouraged solid waste management programs in the world. Prior to the push to use of plastic containers by manufacturers, products were packaged in glass, metal and paper. Therefore, in order to keep our environment clean, reduce landfills, provide a sustainable supply of plastics to manufacturers, it is important to recycle plastics.


Song Ming Machinery Industries Co., Ltd. is a professional manufacturer of PVC pelletizing plants. They are not only reputable for its pelletizing extruders, it also has the best credentials in the plastic recycling peripherals such as granulators, mixers, ribbon blenders, and knife grinders. “Contributing to the World through Recycling plants”, it is their goal. Learn more information about waste plastic recycling plant, welcome to contact with Song Ming.


Article Source: https://www.conserve-energy-future.com/recyclingplastic.php

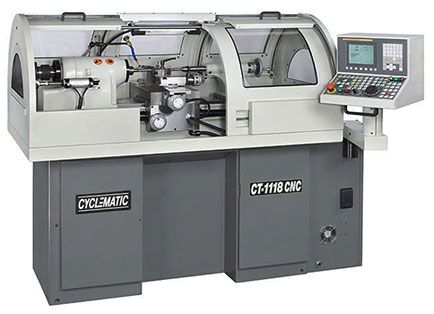
Everything You Need To Know About CNC Equipment

CNC machines are electro-mechanical devices that manipulate machine shop tools using computer programming inputs. Did you know? The name “CNC” actually stands for Computer Numerical Control and it represents one of two common methods to generate prototypes from a digital software file.


The first CNC equipment was developed in the 1940s and 50s and relied on a common telecommunication data storage technology known as “punched tape” or “perforated paper tape.” Punched tape technology is long obsolete as the data medium quickly transitioned to analog and then digital computer processing in the 1950s and 1960s.


How Does CNC Equipment Works:


Machining in general is a way to transform a stock piece of material such as a block of plastic and arrive at a finished product (typically a prototype part) by means of a controlled material removal process. Similar to the other prototype development technology, FDM (3D printing), CNC relies on digital instructions from a Computer Aided Manufacturing (CAM) or Computer Aided Design (CAD) file like Solidworks 3D. The CNC machine interprets the design as instructions for cutting prototype parts. The ability to program computer devices to control machine tools rapidly advances shop productivity by automating the highly technical and labor intensive processes. Automated cuts improve both the speed and the accuracy with which prototype parts can be created – especially when the material is critical (such as is the case with polypropylene – read more about polypropylene).


Oftentimes machining processes require the use of multiple tools to make the desired cuts (e.g. different sized drill bits). CNC equipment commonly combines tools into common units or cells from which the machine can draw. Basic machines move in one or two axes while advanced machines move laterally in the x, y axis, longitudinally in the z axis, and oftentimes rotationally about one or more axes. Multi axis machines are capable of flipping parts over automatically, allowing you to remove material that was previously “underneath.” This eliminates the need for workers to flip the prototype stock material and allows you to cut all sides without the need for manual intervention. Fully automated cuts are generally more accurate than what is possible with manual inputs. That said, sometimes finishing work like etching is better accomplished by hand as well as simple cuts that would require extensive design work to program the machine for automation.


Want to learn about the different types of CNC equipment? Read more below.


Types of CNC Equipment:

CNC machines typically fall into one the two general categories: conventional machining technologies and novel machining technology:


Conventional Technologies:


  • Drills:

Drills work by spinning a drill bit and moving the bit about and into contact with a stationary block of stock material.


  • Lathes:

Lathes, very much the inverse of drills, spin the block of material against the drill bit (instead of spinning the drill bit and putting it into contact with the material). Lathes typically make contact with the material by laterally moving a cutting tool until it progressively touches the spinning material.


  • Milling Machines:

Milling machines are probably the most common CNC equipment in use today. They involve the use of rotary cutting tools to remove material from the stock unit.


Novel Technologies:


  • Electrical and/or Chemical Machining:

There are a number of novel technologies that use specialized techniques to cut material. Examples include Electron Beam Machining, Electrochemical machining, Electrical Discharge Machining (EDM), photochemical machining, and Ultrasonic machining. Most of these technologies are highly specialized and are used in special cases for mass-production involving a particular type of material.


  • Other Cutting Mediums:

There are a number of other novel technologies that use different mediums to cut material. Examples include laser cutting machines, oxy-fuel cutting machines, plasma cutting machines, and water-jet cutting technology.


Materials Used:

Almost any material can be used in a CNC equipment. It really depends on the application. Common materials include metals such as aluminum, brass, copper, steel, and titanium, as well as wood, foam, fiberglass, and plastics such as polypropylene.


Application for Rapid Prototyping:

CNC equipment was the first major break-through in the field of rapid-prototyping. Before numerical control (in the case of punched tape technology) and computer numerical control (with analog and digital computing), parts had to be machined by hand. This invariably led to larger margins of error in end prototype products and even more so if/when machines were manually used for larger scale manufacturing.


Application for Manufacturing:

Many novel CNC specialty machines are built specifically for niche manufacturing processes. For example, electrochemical machining is used to cut highly durable metal products not otherwise feasible. Conventional CNC equipment is more adept at and typically used for prototype development than manufacturing.


By the way, when mentioned CNC equipment, I recommend that you can try to visit the website of SEHO Industry Co., Ltd. if you need more information about CNC machinery. SEHO is the professional supplier of specializing in new or used CNC machinery. They adopt stock supply, you can visit their website to check out the machines that can quickly meet your demands of urgent orders. Now, to obtain further details about excellent CNC equipment, please don’t hesitate to contact with SEHO.


Article Source: https://www.creativemechanisms.com/blog/everything-you-need-to-know-about-cnc-machines

No Machines Are Called Shoe Manufacturing Machines?!

Someone will need to buy shoe-manufacturing machines to make sandals, heels, and boots. However, they don’t know what they are called because running a “shoe making machine” query on Google simply isn’t working. In this article, I will tell you something about “shoe manufacturing machines”.


First and foremost, there is no “shoe making machine” as such.


Shoes are made on several machines including gluers, injection molders, sole makers, toe binders, riveters, upper stretchers, lasts, heat curing ovens, sewing machines, and more. There’s no one machine where you dump in plastic pellets, a square of leather and a buckle and a perfectly finished sandal is spit out the other end. There are lots of steps-each step requires a different machine and there’s some hand work too. Rivets are set by a worker using a riveter. Uppers are sewn by a skilled operator on a special sewing machine designed for sewing uppers. Soles are glued down and cured in a heat treater. So the machines you see are used for making shoes -even if they aren’t called “shoe manufacturing machines


Integral Parts of The Process in Footwear Manufacturing


You might want to become a bit more familiar with the tools, words and terminology and machines used in making shoes. Several fashion colleges have programs for shoe and footwear design starting with design and moving into making shoes and manufacturing processes. You will learn the way they are made and the correct words for each step in manufacturing. Speaking of words -change your search terms: you will have better luck searching for footwear manufacturing equipment and supplies. Again you will find injection molders, sewing machines, heat treaters, cement lasters, leather cutters, skivers, lasting equipment, belt solers, sanders, and band saws, welt stitchers, and more. While none are called “shoe making machines” all are integral parts of the process in footwear manufacturing.


To start you might want to learn custom shoemaking – this is far more doable with less investment. You can start by getting a job in a shoe repair shop and learning the equipment, how it works, what tools are essential (lasts are the most important piece of equipment and/or tool used in making shoes) what goes into making high quality shoes, and how to make and repair shoes. Or look for a custom footwear maker/seller and work there. Learning from a master is a time honored method of learning a skill. When you know what you need from seeing what the master crafts-person uses you can find the specific machinery you need.


Find Out The Right and Suitable Shoe Making Equipment


There are courses in custom footwear and shoe-making -these will help you get a handle on the tools, machinery and the process used in making higher quality footwear. Custom shoe-making can be done in an artisan workshop setting: high fashion shoes and boots made mostly by hand in small quantities can be sold for higher prices and for high profits -and with time you can start to make a name for yourself the same way people like Ferragamo and Louboutin started. Again you won’t find anything labeled “shoes making machine” but you will find lasters, stitchers and more and you will know why these machines are what you are looking for.


MINZ Inc. divided shoe making equipment into three parts, one is shoes cutting machine including plane type cutting machine and traveling head type cutting machine, another is cutting machine energy saving system, and the other is automation development equipment. Their average energy saving is 70~90% comparing to traditional power system. When the machine is not cutting, it generates zero noise, and the temperature of hydraulic fluid and motor are reduced half.


If you are interested in learning further details about related shoe making equipment, please feel free to send inquiries or contact with MINZ.


Article Source: https://answers.yahoo.com/question/index?qid=20130512161017AAfnama

UMTS Antenna and GSM Antenna Supplying Expert – Evercom Communication

Established in 1993, Evercom Communication specializes in manufacturing GSM antenna and UMTS antenna. Furthermore, kinds of other antennas also can be found on their website.


The comprehensive ranges of GSM antenna, including roof antenna, NMO antenna, magnetic antenna, mini magnetic antenna, portable antenna, trucker antenna, marine antenna, on-glass antenna, patch antenna, window clip antenna, wall mount antenna, yagi antenna and base station antenna. If you have any interest, you can try to check out Evercom’s product page.


Let’s get to the point. Evercom’s dynamic research and development team offers unrivaled expertise that enables Evercom to provide wide frequency range of standard, customized and tailor-made UMTS antennas to meet all kinds of customers’ requirements. They credit their success to the continuous efforts into the innovation and dedicated customer service. In addition, Evercom maintains a speedy and flexible process of design, production, packaging and delivery in order to meet the diverse demands.


Would you want to learn more about GSM antenna and UMTS antenna, welcome to visit Evercom’s website: www.evercomtech.com and feel free to send inquiries to them.


Q&A:

What is UMTS?

UMTS is one of the Third Generation (3G) mobile systems being developed within the ITU’s IMT-2000 framework. It is a realization of a new generation of broadband multi-media mobile telecommunications technology.


– From http://www.umtsworld.com/umts/faq.htm


Evercom Communication Technology Co., Ltd.

No.108, Jiesin St., Taoyuan Dist., Taoyuan City 330, Taiwan (R.O.C.)

TEL: 886-3-376-5678

FAX: 886-3-376-5319

E-mail: service@evercomtech.com / gtevercomtech@gmail.com

Before Buying an Air Impact Wrench What You Should Know

Have there ever been times and instances where you or your family member had to build, construct, or even repair something around your home or office, or even do some work on your car, but you just did not have the right and appropriate tools to get the job done? Do you still use a normal, manual winding wrench to loosen or tighten those loose nuts and bolts?


With the power and science of modern technology nowadays, you, your family members, or even your fellow work-mates need not trouble yourselves with the manual and tedious labor of winding wrenches, for there is the air impact wrench! The air impact wrench is also known as an air wrench, air gun, torque gun, or windy gun.


This automated power tool brings high torque productivity while applying the least amount of effort by the user. This is done by accumulating energy in a rotating collection, then abruptly and rapidly distributing to the output shaft.


There are some points to consider however, when using, and more importantly, buying an air impact wrench. Probably the most touched upon issue and concern when purchasing an air wrench is whether or not the impact wrench you are getting, is the not only suitable to your specific needs, but also for the optimal output of the tool in general.


The best and most effective way to get the best impact wrench possible is by checking the brands and models of these wrenches.


Some other concerns and matters to consider before buying air impact wrenches are:


  • Checking how much torque the air wrench contains
  • The manufacturing and design of the wrench
  • Accumulated and total weight of the wrench itself
  • Air compressor size
  • Size drive of the air wrench
  • Budget to purchase the actual wrench


These points, though seemingly common and surely considered before purchasing the actual air wrench by the prospective consumers, are some of the most essential issues which are overlooked by the buyers themselves. Taking these points into consideration when looking to buy an air wrench will help you to make the right choice.


Buying the best wrench for your needs will undoubtedly save you not only time, or money, but ultimately you will have the satisfaction of having purchased the best tool out there for you. Be sure to keep these tips in mind, and you will definitely and certainly become the proud owner of an air impact wrench that will get the job done.


Reliable air impact wrench manufacturer, APACH Industrial Co., Ltd., providing kinds of industrial nailer and wrench for clients. If you have any interest, welcome to visit their website to obtain further details about high quality tools.


Article Source: http://EzineArticles.com/7037971

How to Use a Double Flaring Tool

One of the specialty tools that everybody who does his own auto repair should own is a double flaring tool. With this tool it’s possible to do a professional looking job with brake line or transmission cooling line replacement. Without this tool this is a very difficult job because it’s almost impossible to find the correct length steel line. A double flare is the best sealing and strongest way to flare a tubing end.

Double Flaring Tool FT-10A

Double Flaring Tool FT-10A


  1. Use a tubing cutter and cut the tubing to the desired length. Remove any burrs on the cut end of the tube. Slide the tubing nut on the tube, hex end first.


  1. Loosen the wing nuts and insert the tube in the appropriate opening of the tubing clamp. Place the correct sized adapter upside down beside the protruding end of the tube. Allow the end of the tubing to protrude from the tube to match the thickness of the large part of the adapter. Tighten the wing nuts tightly. Keep the halves of the tool parallel to each other as you tighten.


  1. Turn the adapter over, coat with a small amount of brake fluid and insert into the tube.


  1. Place the flaring tool on the tubing clamp, making sure the screw point is centered on the adapter and the flaring tool is locked on the tubing clamp. Turn the screw clockwise until the adapter bottoms out of the tubing clamp. Final tightening is easier if you clamp the tool in a vise if you have one.


  1. Loosen the screw and remove the adapter. The tubing end should have a bubble look at this point.


  1. Position the flaring tool with the point entering the tubing end and centered. Turn the screw clockwise and tighten until the cone is bottomed out completely.


  1. Remove the flaring tool and inspect the tubing end. The flare should be even all around with no cracks or gaps. Remove the tubing from the clamp.


Warning!!!


Always carefully check the new flare for cracks. Do not use if any cracks are found.


MAXCLAW Tools Co., Ltd. is the double flaring tool manufacturing expert in Taiwan. They provide a variety of hand tools including tubing cutter, tubing bender, hook spanner wrench, deburring tool, PEX crimping tool and more. If you want to get more information about flaring tools or others, welcome to visit MAXCLAW’s website and feel free to send inquiries or contact them directly!


Article Source: https://itstillruns.com/use-double-flaring-tool-5002780.html

How to Use a Tool and Cutter Grinder

Usage of Tool Grinding Machine

A tool and cutter grinder is used to sharpen the edges of tools that have gone dull. The tool grinding machine is not a toy and takes special care and training in order to operate correctly. The tool and cutter grinder is also a rather large machine found in machine shops. It is recommended to take your tools to a professional to grind and sharpen them. The following article will explain how a professional operates a tool grinding machine.


4 Steps to Correctly Use Tool and Cutter Grinder

Step 1 – Prime the Machine

It is always a good idea to turn the tool and cutter grinder on to warm it up. A cold grinder will create rough cuts while a warm or hot grinder disc will produce the best result. Allow the tool grinding machine to run for several minutes before taking tool to the grinding disc.


Step 2 – Safety Precautions

Just looking at the tool grinding machine suggests a medieval torture device. There is a lot of moving parts, guides and rails to worry about as well as the grinding disc itself. Always wear heavy work gloves when using the machine. You also need to wear safety goggles. The grinding disc is typically abrasive and made with diamonds. When grinder begins to sharpen the tool it can cause small fragments of the tool, the disc or sparks to fly toward your face. Getting any of these superheated fragments in your eye can be very dangerous.


Step 3 – Examine the Tool

Not all tools are made the same and it is important to examine the tool you are about to use the tool grinding machine on. You are looking for the angle of the tool, including which way the blade is curved, how the edges are cut and the contact points. This is incredibly important because to properly use the tool and cutter grinder you need to know what direction the tool needs to go. If you fail to do this, you can severely damage the tool you are trying to bring back to life.


Step 4 – Using the Tool Grinding Machine

Double check all of your safety areas and examine your clearance. The kind of tool you are using will determine what the settings need to be. For this information you should always consult the instruction manual that came with the machine you have access to. Not every tool grinding machine is the same when it comes to this. Turn the machine on and keep a safe distance from the grinding disc. Remember the curvature of the tool you are sharpening and place it against the grinding disc at the appropriate angle. A knife, for example, would be approximately 45 degrees. Use short movements and firm pressure until you are satisfied it is sharp.


Top Work manufactures cutter grinders and tool grinders, including universal tool grinder, CNC tool grinder and monaset tool grinder. They specialize in the grinder development to diversify our products and elevate the quality. Quality is an essential, inseparable part of every process at Top Work. For more information about tool grinding machine, welcome to check out Top Work’s website right away!


Article Source: http://www.doityourself.com/stry/how-to-use-a-tool-and-cutter-grinder

Tell You 5 Tips to Find the Right Bicycle Shoes

The right bicycle shoes will offer you comfort while unlocking your performance potential


There are many factors to consider when deciding for new bicycle shoes. In this article, I’m going to give you five tips about what to look out for when choosing the right bicycle shoes.


Step #1: Finding The Right Length

Bicycle shoes are not running shoes! In contrast to choosing a running or even walking shoe you do not need extra room in your bicycle shoes. There is no rolling motion of the foot in cycling. You can easily test if the length of your bicycle shoe is appropriate. Just take out the original insole of the shoe you are interested in buying and step on the insole.


The shoe’s length is ideal, if you have three to five millimeters from the front of your big toe to the upper end of the insole. Make sure that your heel is located right at the lower end of the insole when you carry out this test!


Step #2: Checking The Width


Now that you found the right length you should not compromise on the width! The front region of the foot is the widest part of the foot and very sensitive in cycling as this is where the transfer of power from foot to pedal happens. There should not be any unnecessary pressure or space on the sides of the foot.


Step #3: The Fastening System


Moreover, you should take a good look at your shoes fastening system. Buckles and Velcro should not exert any additional pressure. When fastening your shoe the top material of the bicycle shoe should never fold, otherwise this could apply extra pressure points onto your foot. The form of the shoe is likely to suit to your foot if the fastening system is in a middle position when closing the shoe.


Step #4: Heel Support


A good cycling shoe fit provides a secure anchor for your heel. It should never slip, nor there any extra pressure or pain while walking.


Ask a second person to help you to check if the shoe has a good hold for your heel. This person should press the closed shoe to the floor. Now you have to try to raise the heel. If you manage to raise the heel fully or partly out of the shoe, the shoe is not supporting your heel accurately.


Step #5: Your Personal Impression


Finally: Your bicycle shoes should feel completely comfortable. If you feel that the fit is not perfect ask your dealer if there are any alternative brands or fits that would suit your requirements. Apply the four steps as explained above again when trying other shoes.


BEV.INT’L CORP is the manufacturer of specializing in producing kinds of quality bicycle parts and accessories. Their products include bicycle shoes, frame, front forks, bar ends, saddles etc. If you are interested in learning more information about BEV’s bicycle shoes and so on bike accessories, welcome to check out their website and feel free to send inquiries to them.


Article Source: http://www.solestar.de/en/service/5-tips-on-how-to-find-the-right-cycling-shoe