Mountain Bike Suspension Forks – A Buyer’s Guide

Mountain bike suspension forks vary massively when it comes to travel, shock damping ability, stiffness and weight – and that’s before we even get onto price, which can run into hundreds or even thousands of pounds.


That means it’s important to know what to look for when buying a new fork.


What to Think About When Buying A Fork?

  • Travel

Mountain biking is a very diverse sport and there are suspension forks designed for every type of bike: cross-country bikes generally offer 80 to 120mm of suspension travel, trail bikes range from 120 to 140mm, enduro and all-mountain bikes have between 150 to 170mm, and gravity/downhill rigs go from 180 to 210mm.


The first question is how much travel will work best for you? All other things being equal, the further your fork can move, the more smoothly it can absorb impacts. But longer-legged forks have to be heavier to cope with the extra leverage and bigger impacts.


An extra 10mm of travel will tip head and seat angles back by roughly one degree, which makes steering slower and more stable. Running too long a fork can also overstress your frame and void the warranty, so always check what the recommended travel is for your bike before upgrading. In general, it’s best to replace your existing suspension fork with one with that offers a similar amount of suspension.


That said, many forks have travel-adjust features. These either let you drop the travel in small steps to tweak the bike’s geometry and handling to taste, or crush it down dramatically to give a shorter, stiffer fork.


  • Budget

The next question is budget. Sadly, there aren’t many budget forks that deliver a smooth suspension stroke and stiff, screw-through axle structure without weighing a ton. Damping circuits are also simpler on cheaper models, which mean less control in high impact or multiple-hit situations.


There’s a clear progression in standards of control and consistency up to around £400 / US$670, but after that the waters get a lot murkier and it’s time to be honest about yourself and your riding. The overall performance and reliability of basic forks has definitely improved though.


  • Control

The more travel you have, the harder it is to control – which makes damping control paramount. You should at least get adjustable rebound damping so the fork returns smoothly to its natural ride height, rather than bouncing back up with a clang. More advanced forks also have compression damping to help the spring slow down and absorb the impacts.


Top-end forks split compression damping into two separate circuits – low speed for controlling loads such as braking, cornering or movement under pedaling, or high speed for controlling sudden large loads such as square-edged rocks or landings. Having lots of damping adjustment is only useful if you know what you’re doing with it and have the time to tune it correctly though, so be honest rather than pretending that you’ll become a pro suspension fork tuner overnight.


If you’re likely to plug the fork in, do the minimum setup tweaking and then ride it day in, day out without servicing it then you’ll want a simple but totally reliable unit. If you clean and care as much as you ride, then you can get something a bit needier. If you’re a real fork fettler who’ll spend hours with a shock pump and a safe cracker’s level of dial turning dexterity to find your suspension sweet spot then it’s worth having a full range of adjustments to exploit.


  • Strength / Weight

As well as travel and tuning, you need to think about how much strength you really need, or you’ll just be carrying extra weight you’ll never use. Light, tight forks will suit climbers and other cross-country riders, while super-plush traction Hoovers are worth the extra weight for progressive envelope pushers. Getting the right balance is really important. Fork strength is hard to gauge though, so go by the manufacturer’s recommendations.


  • Compatibility

Most modern suspension forks use tapered steerer tubes which measure 1.5in at the crown and 1.125in at the stem.


There are also three different axle standards to consider: 9mm quick-releases can still be found on some lower end forks, though the majority of cross-country and trail forks now use 15mm thru-axles. Longer travel suspensions forks for enduro and downhill frequently use 20mm thru-axles.


If you have any interest in much more bicycle front forks, I recommend you to visit BEV International Corp. – they are the professional bike parts and accessories manufacturer in Taiwan. You can find kinds of bicycle frames, front forks, saddles, wheel sets there. To get more information of front fork series, welcome to check out their website and feel free to contact with BEV.


Article Source: https://www.bikeradar.com/gear/article/mountain-bike-suspension-forks-a-buyers-guide-55/

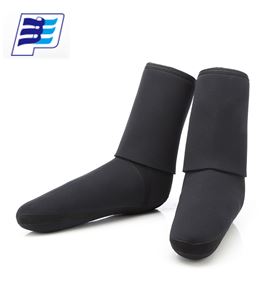
Do You Know What Wetsuit Socks Are? And Why Do You Need Them?

Have you ever heard wetsuit socks? And do you know what they are and what do they do?

Neoprene Socks

In all honesty, these neoprene socks do more than just make getting in and out of wetsuit boots easier, they also have a ton of other awesome features! Whether you’re a surfer, a diver, paddler or an open water swimmer, wetsuit socks are a great layering piece for water sports – and they can even be worn alone.


Just like cold hands, cold feet can also put a damper on your next water sport adventure and no one has the time for that. So, starting with the basic question here, what are wetsuit socks and what do they do?


Just like neoprene gloves or hoods are meant to protect your hands and head, these swim socks were designed to protect your feet from outer elements. Similar to regular socks, but the neoprene version of them, wetsuit socks are a great inexpensive layering piece (worn with or without wetsuit boots) that also insulate feet and wick away moisture. And for all you paddlers out there, socks provide extra splash protection!


If you have any interest in much more choice of wetsuit socks, come and visit Pacific Eagle Enterprise Co., Ltd. – they specializes in kinds of wetsuits, hunting waders, and Neoprene accessories. To get more information of their products, welcome to check out their website and feel free to contact with Pacific Eagle.


Article Source: https://www.wetsuitwearhouse.com/blog/wetsuit-socks/

How to Choose a Suitable Kayak?

When you’re in the market for a new boat, there are many details to consider. First you need to decide what your goals are. Then you can start to narrow down your options. This precursory breakdown of the basic types of kayaks is a great place to start.


Recreational Kayaks

Recreational kayaks offer quick and convenient access to smaller lakes, rivers, and ponds. The combination of lightweight, durable materials and a manageable size makes these kayaks easy to handle both on and off the water. The large cockpit allows easy entry and exit, and the wide hull is designed specifically to offer exceptional stability. Adjustable outfitting and seats are designed with comfort in mind, and storage space provides room when you’re packing lunch or photography gear for the day.


Touring Kayaks

Touring kayaks have a hull design and extra length that allow for fast paddling and straight tracking across long stretches of open water and that provide the required stability needed when conditions become choppy. Storage compartments and hatches provide easy access and enough room for the necessary gear required for overnight or multi-day trips. A spray skirt may be worn to help prevent water from entering the kayak during inclement weather. Some models include either a rudder or a drop-down skeg system to improve maneuverability. Deck rigging provides secure attachment and quick access to items such as a map, an extra layer, or emergency gear.


Sit-on-Top Kayaks

Sit-on-top kayaks are designed for the paddler to sit on top of the kayak rather than inside as in a traditional kayak. This means the kayak is both stable and easy to get into and out of. Depending on the model, sit-on-tops can handle oceans, lakes, rivers, and streams, and their self-bailing design prevents the kayaks from filling with water if you encounter waves. Because sit-on-tops can be easier to get in and out of once you’re out on the water, you can bring an anchor and snorkeling gear along for swimming and checking out ocean life. Deck hardware provides a place for you to attach a seatback if the kayak doesn’t come with seat support.


Whitewater Kayaks

Whitewater kayaks are designed to provide the maneuverability necessary to navigate a river. Beginner paddlers can take advantage of kayaks designed with an emphasis on stability and forgiveness, while advanced paddlers can opt for a design that provides more performance to tackle bigger rivers or to pull the newest tricks. Of all the types of kayaks, whitewater kayaks deal with fastest-moving water, so it’s a good idea to take a class or go out with someone who’s experienced if you’re just starting out.


Fishing Kayaks

Fishing kayaks offer access to large lakes and coastal waters so you can quietly get to where the fish are. An emphasis is placed on stability so the user can focus on the task at hand: catching fish. Fishing kayaks can include accessible storage for a cooler, rod holders, paddle stows, dry storage, and beverage holders. Some fishing kayaks even have enough stability and space so you can stand to cast and raise and lower the seat position for better casting. Outfitting and seats are made to be comfortable so you can get out on the water early and stay until it’s late.


Inflatable Kayaks

Inflatable kayaks are a great way for both novice and experienced kayakers to enjoy anything from mellow flat water to exciting whitewater rapids. The self-bailing characteristics, high floatation, and overall design combine to provide a forgiving yet maneuverable kayak capable of making it across lakes or through the waves undaunted. In some models, there’s enough room onboard to accommodate gear for multi-day trips. And since they’re inflatable, you can transport these kayaks without needing a roof rack and store them easily in the corner of a room or garage.


Tandem Kayaks

Tandem kayaks come in models suitable for recreational, touring, and fishing, in sit-on-top, sit-in, and inflatable designs. Tandems are a great choice for friends, couples, and families and they’re a fun way to get the kids out on the water. Some have a removable front seat for solo paddling or bringing a water-loving dog along. Storage space on board provides room for gear, and adjustable seats and outfitting are designed to comfortably accommodate different sized paddlers. Whatever type of adventure you’re on, a tandem kayak will provide you and a buddy access to fun places on the water.


When you had a great kayak, you will need some high quality kayak deck hardware for it. At this moment, I will recommend that you can visit BroadPlast Industrial Co. – the company specializes in kinds of kayak fishing accessories. If you have any interest, please do not hesitate to contact with BroadPlast.


Article Source: https://www.backcountry.com/explore/how-to-choose-a-kayak

How to Choose Hiking Socks?

The average person takes 2,000 steps to travel one mile. Factor in the up and down of a hiking trail and the roots and rocks you’ll encounter along the way and that number only gets higher. With every step, the right socks play a critical role in keeping your feet comfortable and blister-free throughout your journey.


To choose the best socks for your hiking trip, it’s important to consider these four things:


  • Sock Height: The right height sock protects against abrasion with your footwear
  • Cushioning: The amount of cushioning affects comfort and warmth
  • Fabric: Most hiking socks feature merino wool as the primary ingredient, but some are made mostly from polyester or nylon
  • Fit: Be sure your socks fit well to fend off blisters


Hiking Sock Height

Hiking socks come in different heights, from so short that they don’t even show above your shoes to tall enough to nearly touch your knees. To choose the right height, take a look at your footwear. The higher the cuffs are on your boots or shoes, the taller you want your socks to be so they can protect your skin from rubbing directly against your footwear.


These are the four sock heights:

  • No-Show: These shorty socks provide very little protection against skin-to-boot abrasion, so they should only be worn with low-cut footwear, like trail-running shoes or light hiking shoes.
  • Ankle: Slightly higher than no-show socks, these will usually cover your ankle bone for a bit more protection. They are good for low- to mid-cut shoes and boots.
  • Crew: This is the classic height for a hiking sock. Crew socks typically land a few inches above your ankle bones to protect against abrasion with boots that have high cuffs. There’s no reason you can’t wear crew socks with low-cut boots or shoes, just know that the extra coverage could be warm on a hot day.
  • Knee-High: You’ll only find a few options in the knee-high category, and they’ll probably be for mountaineering. High socks protect against abrasion that big, burly boots can cause around your shins and calves. The coverage can also help keep your lower legs warm when you’re climbing through the night and crossing glaciers.


Hiking Sock Cushioning

The amount of cushioning a sock has given you an idea of how thick the sock is and how warm it will be.


The right amount of cushioning for you depends mostly on the types of trips you go on and the weather you expect. A bit of cushion can protect your feet during high-impact activities like running and backpacking, but keep in mind that thicker socks are warmer and can cause your feet to sweat. You may have to experiment to find the right balance of cushion-to-warmth that works for you. Having a variety of socks to choose from in your sock drawer is helpful.


The four types of cushioning:


  • No Cushioning: These ultralight socks are designed for use in hot weather. They are very breathable and have little padding. A handful of socks in this category are liner socks, which some hikers like to wear underneath a lightweight, midweight or heavyweight hiking sock. Liner socks were once very popular for their ability to wick moisture and to keep feet dry, but nowadays many hiking socks perform well enough to not require a liner sock. However, if you know liner socks work for you, you can certainly keep on using them.
  • Light Cushioning: Best for warm conditions, socks with light cushioning prioritize moisture wicking and comfort over warmth. They are relatively thin, but have some light cushioning in key places, like the heel and ball of the foot.
  • Medium Cushioning: These socks provide a good amount of cushioning in the heel and ball of the foot for hiking and backpacking and enough warmth for use in moderate to cold conditions.
  • Heavy Cushioning: These are generally the thickest, warmest and most cushioned socks available. They are made for long trips, tough terrain and cold temperatures. They’re often too thick and warm for backpacking journeys in warm weather, and are best used for mountaineering or on cold-weather backpacking trips.


Hiking Sock Fabric Type


Hiking socks are rarely made from a single fabric, but rather from a blend that creates the right balance of comfort, warmth, durability and fast drying. These are the most common materials you’ll find in hiking socks:

  • Wool: Wool is the most popular hiking sock material and the one that our footwear specialists recommend above all others. It regulates temperature well to keep your feet from getting sweaty and it provides cushioning. Another plus is that wool is naturally antimicrobial so it tends to retain smells less than synthetic fabrics. These days most socks are made of merino wool, which is essentially itch-free compared to older types of ragg wool socks. And most wool socks use blends of wool and synthetic materials for better durability and faster drying.
  • Polyester: Polyester is a synthetic material that insulates, wicks moisture and dries quickly. It is sometimes blended with wool and/or nylon to create a good combination of warmth, comfort, durability and fast drying.
  • Nylon: This is another synthetic option that is occasionally used as the primary material. It adds durability and can help improve drying times.
  • Silk: A natural insulator, silk is comfortable and lightweight, but not as durable as other options. It’s occasionally used in sock liners for reliable moisture wicking.
  • Spandex: Many hiking socks include a small percentage of spandex. This elastic material helps socks hold their shape and keep bunching and wrinkling to a minimum.


Hiking Sock Fit

Getting socks that fit right will help keep your feet comfortable on hiking trips. If your socks are too big they can have wrinkles that will rub and may cause a blister. Too small and they can create pressure points and sock slippage.


To find the right size, it’s helpful to know the size of your actual foot rather than your shoe size because sometimes people size-up in shoes, which can lead to buying socks that are too large.


If you need comfortable and suitable hiking socks, I recommend that you can visit Footland Inc. – the company specializes in kinds of waterproof socks and athletic socks. Get more details, please do not hesitate to check out Footland’s website immediately!


Tips:

How socks should fit: When you try socks on, look for a snug, but not overly tight fit. A sock fits properly when the heel cup lines up with the heel of your foot.


Article Source: https://www.rei.com/learn/expert-advice/backpacking-socks.html

What are Kayak Scupper Plugs: How and Why You Should Use Them

If you’re planning your next kayaking adventure, you should be prepared for the challenge. That means having appropriate equipment at your side. Kayak scupper plugs fall into this category, as well. If you haven’t used kayak scupper plugs until now, our article will serve as an informative guide on the topic.


Introducing Scupper Holes

To start with, sit-on-top kayaks are equipped with scupper holes. You may find them in the foot walls, cockpit, and tank well of your kayak.


Essentially, the holes aim at draining away the water from the kayak. Especially when the load becomes heavy. They also have the purpose of supporting the deck, as the kayaker sits on top of it.


While this feature can come in handy, it is linked to an evident inconvenience: it might get everything in the kayak wet.


The good news is that you may block the scupper holes by using kayak scupper plugs.


What Is the Purpose of Scupper Plugs?

For the most part, their primary objective is to maximize your safety and comfort, keeping the water out of your kayak – we know how annoying that can be.


Simply put, having a set of reliable scupper plugs will prevent you from sitting in a puddle. Or, in worst case scenario, it will deter the kayak from becoming a bathtub overflowing with water.


So, scupper plugs are specifically created to fit in those holes. Perhaps this didn’t occur to you until now. Nevertheless, it might happen, especially in choppy waters.


The second purpose of scupper plugs is to increase the rigidity of the hull.


Should There Be Any Water in My Kayak?

If you have used scupper plugs, and some water still managed to enter your kayak, you needn’t worry. The fact that there’s a bit of incoming water in your kayak doesn’t necessarily mean you’ll sink.


Irrespective of the kayak’s capacity and the scupper plug specifications, some water will inevitably enter your kayak – one way or another. Nevertheless, there’s a crucial distinction between abundant water and a relatively low level of water.


The bottom line is that having excessive water in your kayak is quite problematic. Therefore, you should avoid that, as much as you can.


At the same time, to get excellent results and keep the water at a distance, you should place the scupper plugs tightly. The harder you plug them in, the more airtight they will be. This way, you minimize the likelihood of sitting in a pool of water.


Are Scupper Plugs Necessary or Not?

Scupper plugs definitely come in handy. They do an excellent job at maintaining the kayaks dry, significantly reducing the amount of water in it. We find them to be specifically useful during long boat rides.


For instance, if you plan on paddling in calm waters with no waves whatsoever, the scupper plugs might even keep your kayak dry.


Conclusion

So, what are kayak scupper plugs?


In short, they’re a tool to help you keep water out of your kayak, all in an effort to make your ride more enjoyable.


If you need more information about Kayak Scupper Plugs and more Kayak Deck Hardware, please try to visit BroadPlast Industrial Co. – they are the professional manufacturer of kayak accessories. Get more details, welcome to check out the website of BroadPlast immediately.


Article Source: Riverratguide.com

How to Choose the Right Jogging Socks

Jogging Socks?


Yes, these are socks made specifically for runners. What makes them different from your typical casual socks is that they are designed to keep your feet dry and comfortable while jogging for prolonged periods of time.


When you run, especially if you sweat a lot (who doesn’t), it’s crucial to equip your feet and your shoes with socks that are comfortable, functional, durable, even fashionable (if you are into that).


The Importance of Jogging Socks


Oh, let me assume you. Socks are not a second-thought accessory. In fact, picking the right jogging socks is just as important as choosing the right shoes. Not only can the proper socks improve your running performance, but can also help keep your feet healthy and happy.


An ill-fitting pair of socks can result in toenail problems, bursitis, blisters, infections, and other serious foot issues that may compromise your running. And you don’t want any of that.


Whether you are going for a short jog around the block, or are conquering long, treacherous trails, the right pair can set the stage for a comfortable, pain-free workout experience.


In short, jogging sucks without the right socks.


And here is the good news. Buying jogging socks is not rocket science.


That’s why today, dear reader, I’m spilling the beans on proper sock selection. In this post, you’ll find a list of handy tips and practical guidelines to help you make the right sock choice.


Use the following tips to help you choose jogging socks that will help your feet dry and comfortable so you can ensure consistent running success.


So, are you excited? Then here we go.


The Many Flavors


Athletic socks come in a variety of fabric types, sizes, thicknesses, and cushioning features. These are the main things to consider when selecting the right jogging socks.


Consider the following elements when choosing your jogging socks.


  1. Say No to Cotton

The most important factor to consider when cherry-picking socks for running is, hands down, the material.


As a rule of thumb, steer clear of cotton the entire time.


Why? Cotton is spongy and absorbent. Once your feet get wet (whether due to sweat or after stepping in a puddle), they’ll stay wet, and the moisture won’t get “wicked away.”


And here is the real bad news. Running in damp socks sets the ideal breeding ground for bacteria (nasty smells), and blisters (nagging injuries). And you don’t want either.


Not only that, running in the winter with cotton socks will make you feel damp and cold. And that makes for a miserable run.


Sure, cotton is cheaper than technical moisture-wicking synthetic materials, but the proper technical running attire is well worth the extra buck.


Functional Materials for the Socks

Our feet are a work of wonder. They contain about 250,000 sweat glands. Put simply, our feet sweat a lot. That’s why you need running socks made with technical materials, lightweight and equipped with excellent sweat wicking properties.


High-performance socks are specifically designed for runners—they pull moisture away from the skin, and won’t let it turn into an abrasive material that will rub against your feet—all of this helps keep your feet relatively comfortable and dry.


Ideal running socks are made from synthetic materials such as acrylic, CoolMax, and polyester. Look for these in the ingredient list whenever you are purchasing new socks. Some high-performance socks are also designed with a mesh venting system.


Also, consider looking for fabrics with anti-odor properties to keep your feet clean and smelling fresh.


Got Any Blisters?


If you’re prone to blisters, consider doing any of the following to limit friction between your feet and the inside of the shoes:


  • Opt for anti-blister socks that have a double layer system; or
  • Wear a second layer sock for extra blister protection; or
  • Go for thicker socks.


  1. The Right Size

When running, it’s essential to have athletic socks that fit properly. Pair that’s too large or too small can bunch up and sag, and won’t provide you with the right cushioning that is required.


It also should not irritate your skin, nor leave a substantial imprint, particularly in the calves or ankles.


So, as a rule of thumb, avoid socks that bunch up and slip your shoes. Anytime you have something rubbing against your skin, especially if your skin is damp, you run a high risk of getting painful blisters. And you don’t want that.


Your socks must be a perfect fit, especially under the arch of the foot and around the heel. They shouldn’t slide around.


To make sure you have the right size, make sure that the heel portion of the socks perfectly lands on your heel without stretching.


Also, your jogging socks should be worn fairly tight to the skin, but not so tight that they overstretch or restrict the movement of your toes.


  1. The Many Lengths

In general, socks usually come in four different lengths. Which length you go for depends on the weather, training intensity, and your own personal preferences.


Here the main types:


  • Knee length—usually compression socks that sit just below the knee to cover the entire calf
  • Crew length—these come up to the calf.
  • Anklet—these sit right above the ankle, as the name implies.
  • Socklet—these sit just above the shoe line.


  1. Thickness of Fabric

Just like thickness and size, jogging socks are also designed with different levels of padding. Different athletic sock materials and styles will provide different levels of cushioning.


Which type of sock you choose depends, as always, on your personal preference. No suit fits all.


Thick Vs Thin

Thick socks typically have extra padding in the heel and toes, which offers superior underfoot comfort, more cushioning, and blister protection, but might be a hurdle when trying to fit into a new pair.


In general, thicker socks are most appropriate for cooler seasons.


On the other hand, the thinner socks are lighter and tend to have a better road feel, but might result in excessive friction when running, especially if you’re prone to blisters.


Generally, thin socks are ideal for hotter seasons.


What’s the Best Choice?

Whether you choose a well-padded sock, or something more minimal, in the end, it all boils down to your personal preference.


For instance, super thin socks might not feel comfortable for some individuals, whereas a super thick pair might affect the fit and comfort of the shoes.


But all in all, choose socks that have at least a degree of padding at all points of contact around the foot. Proper socks should offer a degree of cushioning at impact zones. These are typically most used and abused parts of your feet.


Try it with the shoes

Keep in mind that the thickness of your sock affects the fit of your shoes, requiring you to go up at least a half shoe size to accommodate for the additional cushioning.


So, when you are trying out a new pair of shoes, make sure to do so with the socks you are going to be running in.


  1. Compression Socks

According to the current theory, compression socks may speed up recovery and improve performance.


Of course, there is still much debate about this, but it’s something I think you should give it a try and see for you. I believe that it works.


I don’t know exactly how effective compression socks really are when it comes to performance and recovery, but I do enjoy putting them on both during and after my runs—especially long runs.


Compression socks are designed with gradual compression, which improves blood flow to the muscles. This is believed to lessen muscle fatigue and speed up recovery following a workout.


Some high-tech running socks are designed to mildly compress your muscles to enhance blood circulation, reducing fatigue, and speed up recovery time—all of which can help you run farther for longer and with less fatigue, and soreness.


Also, according to theory, compression socks may reduce your chances of injury and ward off muscle soreness and swelling.


Just make sure they fit right. Compression socks shouldn’t feel too tight. After all, their primary purpose is to aid blood circulation to the muscles rather than hindering it.


To ensure that you have the right fit, get a tape measure, measure around the broadest part of your ankle (this measurement is often called the circumference), then measure the widest part of your calves.


Next, while sitting on a chair with your knees bent at a 90-degree angle, size up your calf length by measuring the distance from one finger below the bend in your knees to the ground.


Last up, match your results against the size guide and recommendations on the individual socks’ pages.


Also, you might need to experiment with several brands and styles before settling on one that feels the most comfortable for you.


To Conclude

But in the end, it’s really a question of personal preference. That’s why you need to experiment with different socks lengths and sizes to find the type of socks that works the best for you in different seasons and conditions.


My best advice is to get a variety of socks. By doing so, you’ll be better prepared for any circumstance or weather conditions that come your way.


If you need more information about jogging socks or other athletic socks, try to check out the website of Footland Inc. – the company specializes in kinds of socks including waterproof socks, mountaineering socks, seamless running socks, and much more socks.


Article Source: Runners Blueprint

Let’s Talk About SUP Leashes

SUP leashes provide a simple and secure way to keep a paddler with their board. Wearing a leash should be second nature, like wearing a seat belt in a car. But do you know about the different types of leashes, and understand when and where they should be used?


History of The Leash

Invented around 1970 the surfboard leash started off as a very springy and often dangerous way to prevent a board making its own way back to the beach. The equipment we now regard as essential to safety may have been responsible for Jack O’Neill losing his eye in 1971 from a ‘whiplashing board’. Not the best start for safety equipment!


The use of urethane for the leash became commonplace in the mid to late 1970’s reducing the whiplash effect (but not removing it) and making them far more durable. According to some sources (Surfer Magazine, 2011) 99% of surfers use one. Even with such apparent support for the use of leashes there are surfing applications where their use is questioned. The loss of Mark Foo at Mavericks in 1994 has been blamed on his leash and that discussion continues today.


For SUP use the urethane leash has been beefed up a little to cope with the larger boards and higher volumes. But they look just like standard surfboard leashes so when buying one make sure it’s suitable for your board.


Types of SUP Leashes

There are two types of leash, coiled (commonly used for flat water), and straight (commonly used in surf and other general paddling) both typically fit around the ankle or calf. However these leashes are also available with a quick release mechanism which then typically attached to a belt worn around the waist, allowing for quicker and easier release from your board (commonly used in moving water and also now popular when racing)


Straight Leash

This type of leash is ideal in the surf, because it has less spring back than a coiled leash (and therefore less chance of your board coming back and hitting you in the face!) and it trails in the water leaving your deck clear to move your feet around the board. Ideally a surf SUP leash should be at least the length of your board. A straight leash is the most universal leash as can be used in not only surf but also flat water and moving water (with a quick release attachment). So if you want one type of leash to use on flat water and in the surf then get yourself a straight leash.


Coiled Leash

These are most commonly used in the flat water SUP and race scene. Sitting comfortably on the deck out of the water, they produce less drag and reduce the risk of getting caught on seaweed, and other paddler’s paddles etc.… Not for use in the surf due to their spring back board potential! If you do use a coiled leash in the surf (not recommended) you can guarantee it won’t be coiled for much longer!!


Quick Release Leash

The quick release is an attachment that can be added to any standard straight/coiled leash, or you can buy a specialist quick release leash. Gaining in popularity the quick release leash is worn around the waist as a belt, either on it’s own or as part of a buoyancy aid/hydration pack. The quick release is a buckle, usually with a toggle attached to it so it can be grabbed quickly and pulled open, releasing the paddler from the board almost immediately. Probably developed from harnesses used by White Water kayakers this type of leash is starting to appear on the race and surf race scene too. When racing it eliminates any chance of the leash dragging in the water, keeps it out of the way when stepping back for buoy turns and moving around the board, and allows for quick and easy board transitions during races.


In white water a quick release leash is vital in the event of a situation when you need to separate from your board quickly e.g. becoming held by the water against an underwater obstacle. Therefore when white water paddling a quick release leash is essential.


How to Attach A Leash

The vast majority of boards will come with one or more specific leash attachment points, usually found near the tail of the board. On an iSUP this is likely to be a steel D ring glued to the board, on hard boards they are often recessed into the deck. Leashes will usually come with a length of string attached to a rail saver. The string is the connection between the board and the leash.


Surf SUPs will typically have one leash attachment point at the tail, but longer, race boards frequently come with a leash attachment point in front of the deck pad allowing a shorter leash to be used and reducing the chance of it dragging in the water.


How to Look After A Leash

Leashes will have a hard life! As well as being stretched, on an iSUP they are frequently looped around a rolled board to keep everything tidy, and on hard boards you’ll see them wrapped around the tail when in transit. Doing this can develop kinks in them and the urethane can easily be damaged. Therefore urethane leashes should, when not in use, be removed and kept out of the sun. It’s worth storing your leash with your board so there’s no chance of forgetting it.


Your leash is the most important bit of safety equipment you have, so check it regularly for any signs of wear and look after it. They’re not cheap, but a leash is there to save your life, so if you think it’s starting to look a bit tired and needs replacing – then replace it. Don’t just wait for it to snap!


When to Use A Leash?

The simple answer is always. End of discussion.


But nothing is that simple, using the wrong leash can be more dangerous than not wearing one at all.


In the sea, SUP surfing, a SUP leash is a necessity not an accessory. And the vast majority of SUP surfers will wear a leash without hesitation. But using one is not the end of the SUP surfers’ responsibility. A big board at the end of a long leash could do a lot of damage in a crowed line up. And in the surf, a SUP board of any size on the end of a coiled leash is asking for trouble too! Always consider the safety of others in the water, as well as your own safety.


For coastal exploration or flatwater paddling a leash makes sense most of the time, they are comfortable and don’t get in the way, and keep you connected to your board (flotation device). However a big flat river can have a strong current and be moving a huge volume of water, just like in a WW river. UK rivers are often not clear water, carrying silt which means that obstacles under the water e.g. tree branches etc.… are not always obvious. Leashes can easily be caught around these objects as well as pontoons, jetties, buoys etc.…


So sometimes undoing a leash would be a good idea whilst paddling, for example when getting on or off a board at a pontoon with a strong current. Better to undo your leash and climb out with the risk of losing your board, rather than getting pinned and losing your life.


No matter how you look at it, a Velcro strap attached at one extremity of your body is not an easily accessible quick release. Have you ever tried reaching your ankle against fast flowing water? Not much fun and near impossible.


So is the future of the SUP leash around our waists? Any leash can be converted to a waist leash with quick release so it would seem to be the sensible thing to do for all but SUP surfing.


If you need more information about sup leashes, please try to visit the website of BroadPlast. The company offers a wide range of kayak accessories including kayak fishing accessories, deck hardware, handles, sup leashes, bungee and bungee connections, fasteners as well as some other marine hardware. Get more options, welcome to check out BroadPlast product pages and send inquiry to them.


Article Source: SupBoarderMag.com

The Best Running Socks for a Marathon

Keeping your feet free from blisters and pain is essential to finishing a marathon and the right socks contribute to your foot health. When choosing the best marathon socks for you, consider the material, cushioning, height and special features of the socks. Most importantly, choose your socks early in your marathon training so you have plenty of time to ensure they won’t cause blisters or hot spots on your feet.


Material Choice

Cotton holds on to moisture, leaving it on your feet where it can lead to chafing. Avoid cotton and opt instead for synthetic or wool socks. Synthetic socks are typically made from a combination of acrylic, polyester or spandex. These materials wick the moisture away from your feet, leaving them drier and with less chance to blister. Synthetic materials tend to dry faster than wool socks, while wool socks may provide more insulation in extreme temperatures. Consider synthetic socks if you plan to race on a hot, humid day and wool socks if you plan to race in the winter.


Pick Your Padding

Choosing the best cushioning is primarily personal preference and you may have to run in a variety of socks before you find your favorites. However, a few general guidelines may help you narrow your choices. If you already run in a well-cushioned shoe, thin socks with little cushioning may work well. If you tend to like lighter, less cushioned shoes, consider a more padded sock to protect your feet from the repetitive impact they’ll endure over 26 miles. Because the thickness of the sock can affect the temperature of your feet, you may need to adjust your choice based on the predicted conditions of the race, opting for thinner marathon socks if it will be a hot day.


Select a Height

Sock height can play a role in skin protection. No-show socks cover only the part of your foot in the shoe and are best if you don’t get blisters on your Achilles and want a minimal sock. Low socks cover your foot and part of your ankle, while quarter socks typically cover your entire ankle. Low and quarter socks can help prevent blisters on the Achilles. Crew socks cover your ankle and part of your calf, while knee-high socks cover your entire calf. Choose crew or knee high marathon socks if you’re running a trail marathon and want to protect your calves from branches or weeds.


Special Features

Like any sports equipment, a variety of specialty running socks are available. Some runners choose knee high compression socks in the hopes of preventing calf cramps. Others choose socks with toes, hoping to prevent blisters between the toes. Your best bet when it comes to special features and socks is to try them in training. If they work well on long training runs, they’ll likely serve you well on race day.


Best Marathon Socks Manufacturer

If you need more information about marathon socks and compression socks manufacturer, I recommend that you can visit the website of Footland Inc.


The company is a reliable socks manufacturer with a fully integrated operation chain from design sketches up to packing and delivery. They also imported Lonati machines from Italy for making various and competitive socks.


Footland Inc. is reputable for its strict quality control with a clientele of international brands including Timberland. Learn more details, please do not hesitate to contact with Footland.


Article Source: LIVESTRONG.COM

Help, I’m a Beginning Archer and I Don’t Know What to Buy!

Whether you’re just getting started in archery or you’re getting back into the sport after being away from it a while, it can be confusing to know what equipment you should and should not get right away. There’s a ton of fancy and not-so-fancy stuff out there, but some of it is not really needed until you build up your skill level a bit.


We hope this article will help you understand what things you absolutely have to have to get started, what archery accessories is a good idea but you can do without at first, and which items you might start planning to pick up along the way.


Items You MUST Buy to Get Started

These are things you simply cannot do without, because they’re essential to the sport of archery, whether you’re just kicking around in the backyard or getting ready to take your archery out onto the competition range or the hunting lands.


a) The Bow

You will need a bow, of course. You can’t practice archery without a bow, and you should make sure you buy the best recurve bow that fits your budget.


b) The Bow Stringer

A bow stringer is essential to any recurve archer’s kit, because it is the only way to safely and consistently string a bow. The bow stringer helps you safely use your body weight to bend the recurve bow enough to slip the string over the limb tips. Your grandfather might have used a “step-through” method to do this, but that is dangerous for both you and your bow, so make sure you always use a bow stringer to put the string on your recurve bow.


c) Arrows

Arrows, along with field tips, are the next required item, and you should purchase more than one. Most sporting goods stores will sell you a 6-pack or more of arrows. It’s often a good idea to buy arrows at the same time that you’re buying your recurve, since the bow technician who helps you pick out a good recurve will be able to measure your draw length and help you buy the right size arrows. If this simply doesn’t work out for you, though, we have a handy guide on choosing arrows.


d) Nocking Points

The purpose of a nock point is to provide you with a constant place on your bow string to nock your arrow. This is important because it will provide consistency of shooting so your arrow has a better chance of going where you want it to go every time to shoot your bow. It also helps make sure you don’t nick your bow hand with the arrow’s fletching or vanes. You can make a nock point from brass points, from serving string, or from tape. The bow technician who helps you set up your bow or any experienced archer can help you with setting your nock point where you need it.


e) Targets

Once you have all your essential gear together, it’s time to go cast some arrows. But wait, what are you going to aim for? Targets are essential, and can be as simple or as fancy as you’d like. Some days, I’ll just draw a picture of a cottontail rabbit on a piece of paper and shoot at that, while other days I’m looking for more refined knowledge about where my arrows are landing and will use a circular bulls-eye target. In addition to the target, though, you need some sort of a backstop to stop your arrows from going straight through the target and out into somebody’s fence or arm. Archery shops and sporting goods stores sell foam blocks that serve nicely, but you can also use a few bales of hay.


Recommended, but Not Required Items

This list will let you know some items that are nice to have, but you do not absolutely have to invest in them right away. Most of these items are comfort-related, though, so you may consider purchasing or making the first two items no matter what just to make sure you can get the most enjoyment possible out of the sport.


a) Arm Guard

An arm guard covers your forearm, and sometimes your entire arm, to keep your sleeves, hair and skin out of the way of the bowstring as you release your arrow. As you start learning the proper technique, you should learn how to adjust your elbow vertically to keep most of your arm out of the way of the string, but until then, you should wear an arm guard that covers as much of your arm as possible. The string will smack or drag along your arm from time to time, especially as you’re learning the sport, and you don’t want your skin to be in the way when that happens.


b) Glove or Finger Tabs

If you shoot a bow without something to protect your fingers, you will end up with painful blisters that will eventually lead to problems with your release. You can wear a leather glove or finger tabs on your shooting hand to prevent these blisters. Modern finger tabs sometimes also include spacers that spread the index and middle fingers apart, helping to keep the archer from pinching the arrow.


The good news is that you do not have to buy this item. You can make your own finger tabs—Scout troops quite often make their own finger tabs, and the patterns or kits are readily available.


c) Arrow Rest

If your bow doesn’t include an arrow rest, this is something you may want to invest in early on. The arrow rest is what the arrow sets on as it is drawn, and can be a simple fixed rest or a complicated drop-away rest that falls out of the way as the arrow is released. For short-term use, some archers can use their hands as a makeshift arrow rest, but an actual rest is something you’ll want to install on your bow after you get it broken in and know you’re going to continue practicing archery. We will be adding an article soon to help you select the right arrow rest for your need, so stay tuned!


d) Broadhead Wrench

A broadhead wrench allows you to unscrew a broadhead tip from your arrow without slicing your fingers open. If you are only using field tips for your archery, this might be something you can wait on until you’re doing some sort of archery that requires broadheads.


e) Bow String Wax

If you look at your bowstring through a magnifying glass, you’ll see millions of fibers that make up just one strand of your string. If not properly lubricated, those fibers rub together and create friction that can lead to the strands snapping, thus shortening the life of your string. To help prevent that from happening, archers was their bow strings with bow string wax, which provides good lubrication while also providing a layer of protection against water and other elements you might encounter in the outdoors. Buy quality bowstring wax, wax your bowstring every 2 to 4 weeks, and your bowstring will last much longer.


Optional Items

The rest of these items are handy, but they are not necessary to have. They’ll make your archery a bit more fun, though, so these are definitely things to put on your wish list for later on down the road, when you know that archery is something you’re going to stick with.


 a) Sight

A sight is used to help you aim your bow. Most recurve bows don’t include sights; because many recurve bow archers prefer the challenge of instinctive shooting, or shooting without the aid of an aiming aid like a sight or another point of reference. Still, sights are perfectly legitimate to use, and can sometimes help the beginning archer learn where to look and how to aim for instinctive shooting.


 b) Quiver

A quiver is a container used for holding your arrows before you shoot them. Sometimes, archers will just stick their arrows into the ground, but this can be tough on the arrows and arrow tips and inconvenient for the archer. Some quivers attach to the bow while some are worn around the waist or shoulder. Quivers make it much quicker to pull a new arrow for the next shot. It’s not an essential bit of equipment, but it’s definitely nice to have.


 c) String Whisker Silencers

Whisker silencers are lightweight rubber silencers that reduce the noise of your bowstring without compromising the performance of your bow. These are not so important for backyard or target archery, but they are wonderful add-ons to your bowstring when you start bow hunting.


Summary

This list of items should get you started, as well as give you a wish list of items to buy as you build your skill as an archer and branch out to other forms of archery. If you have any questions about any of these items, or product recommendations, just let Man Kung Company know and they will help you out.


Established in 1988, the Man Kung Crossbow Manufacturer is dedicated to the design and manufacture of a wide range of crossbows, archery bows and related products. Since the company was established, they have always been dedicated to the research and development of new products to meet current market demands. Man Kung’s outstanding quality has won us a high reputation from both domestic and international customers.


More details, try to click here: https://www.archery-manufacturer.com/


Article Source: Recurve Bow Guide